I’ve always loved the soft, slightly sweet, Japanese bakery bread that can be found in most Asian markets. (The Chinese & Taiwanese also have a version of this bread that is nearly identical.) But how do you replicate the soft fluffiness of this bread when making at home? Most “milk bread” recipes out there still come out with less softness and seem drier compared to the original bakery version.
I’ve been tinkering around with my awesome new Zojirushi Home Bakery Supreme Breadmaker… and after making several loaves of bread, I continue to be disappointed with the outcome. I’ve made some wonderful Western style loaves… but I want Japanese Milk Bread!!! After doing a lot of research online, I came across references to a technique popularized by Taiwanese cookbook author Yvonne Chen. Her book, (translated title) “65 degrees C Tangzhong,” references a very old Japanese bread-making technique calling for the addition of a water roux to improve texture.
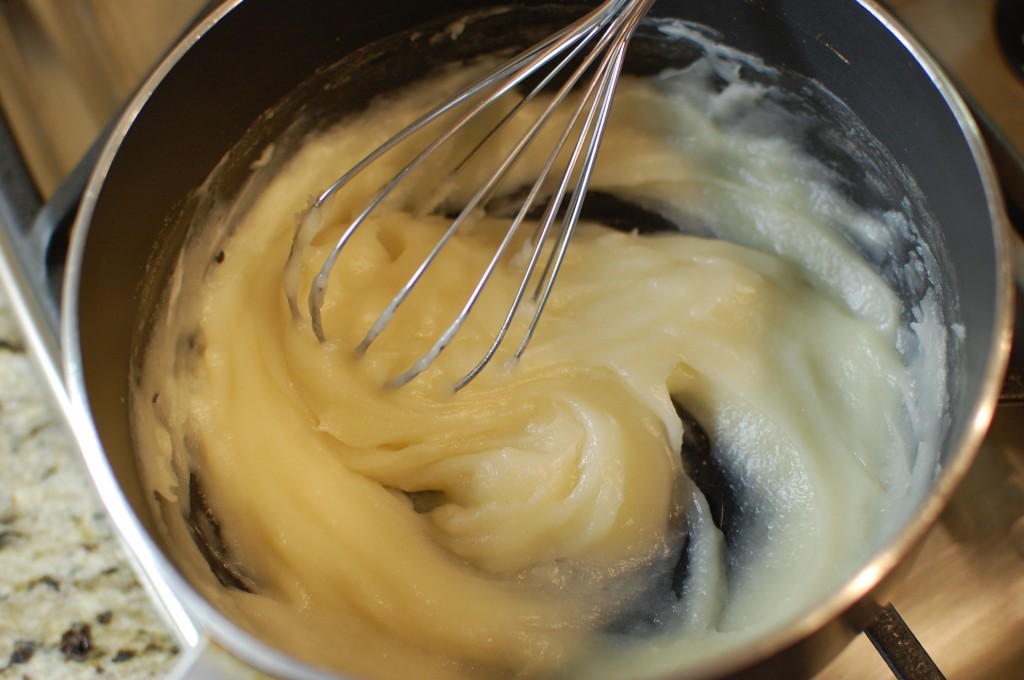
To make the “tangzhong” or “water roux,” a mixture of water and bread flour is heated (and stirred) just until it forms a paste. Then, this paste is removed from the heat and allowed to cool, and added to the dough ingredients. When the water and flour first combine, the flour absorbs the liquid (hydration). Once heat is applied, the flour particles swell many times their original size and burst, releasing starch into the liquid. At that point, the mixture has gelatinized into a thick slimy goo. The gelatinized flour can then be used as a dough enhancer to improve the moisture and texture in the final bread loaf – which also seems to prolong the freshness. Japanese bread doesn’t get stale and hard (like a French Baguette) within a day of baking – it stays soft and fluffy for several days (if your bread even lasts that long).
I used my Zojirushi Breadmaker to knead the dough and allow it to rise – but you can adapt this recipe for hand or stand-mixer kneading if you do not have a bread machine. If you are kneading by hand or using a dough hook on your stand mixer, make sure that you develop the gluten enough that the dough is elastic and you can stretch it to get a “windowpane effect”. This should take about 15-20 minutes. Then, put the dough into a non-stick (or greased) bowl, and allow to rise (covered) for 30-45 minutes in a warm place until it is doubled in bulk. Punch down before dividing and shaping into logs.
Japanese Milk Bread:
- 2 1/2 c. bread flour
- 2 tsp. active dry yeast
- 4 T. sugar
- 1/2 tsp. salt
- 1 egg
- 1/2 c. milk
- 3 T. unsalted butter
- 1/2 c. tangzhong (see recipe below)
Tangzhong (water roux):
- 1/3 c. bread flour
- 1 c. water

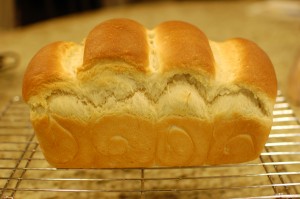

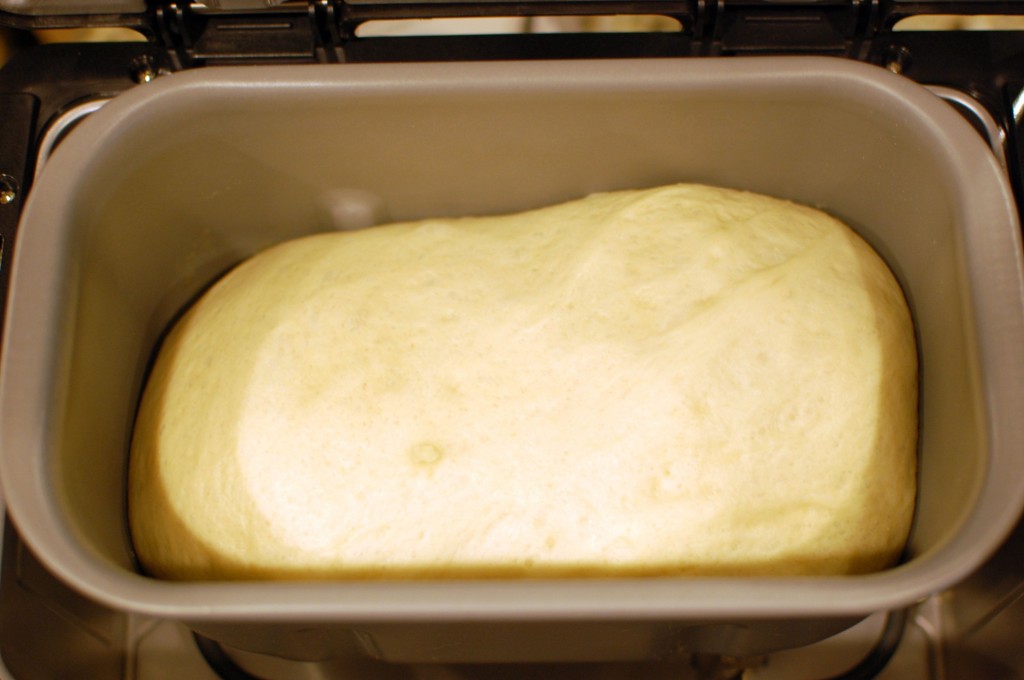
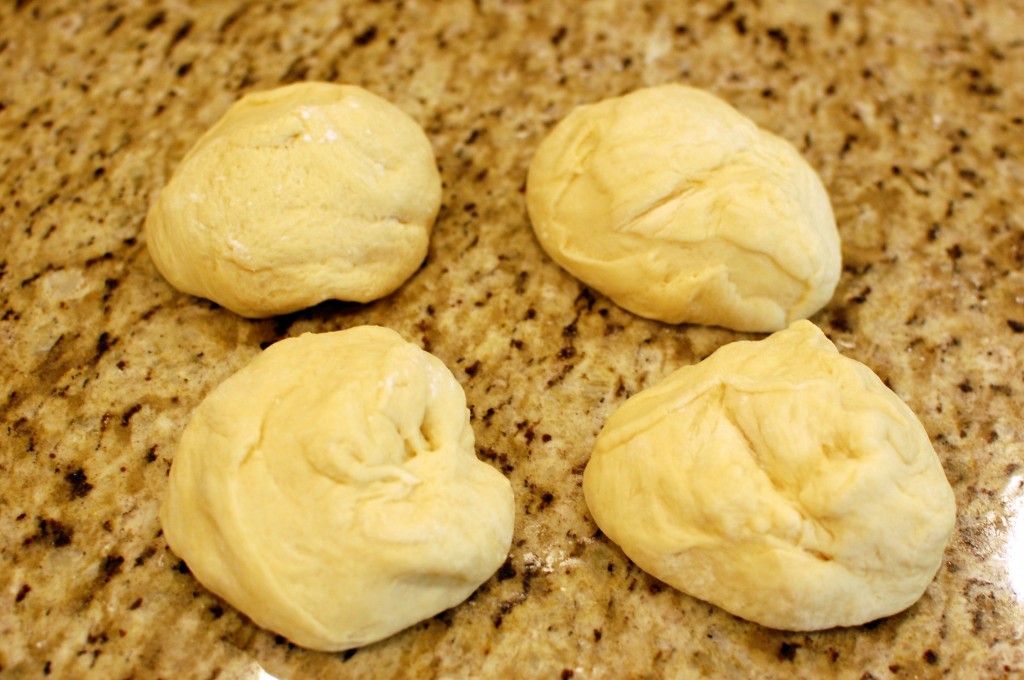
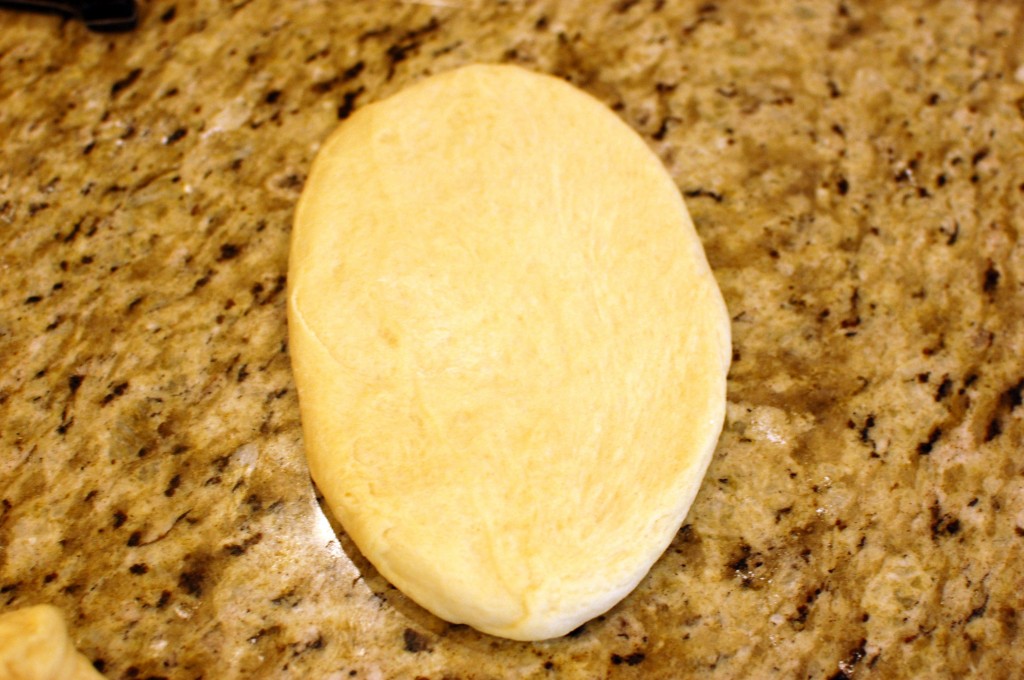
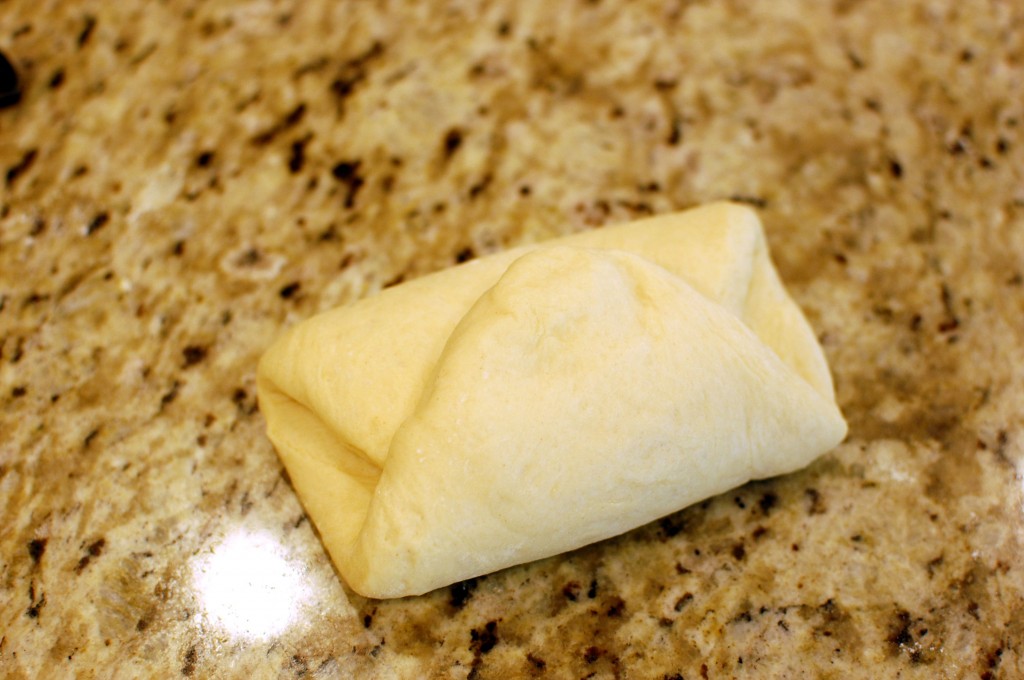
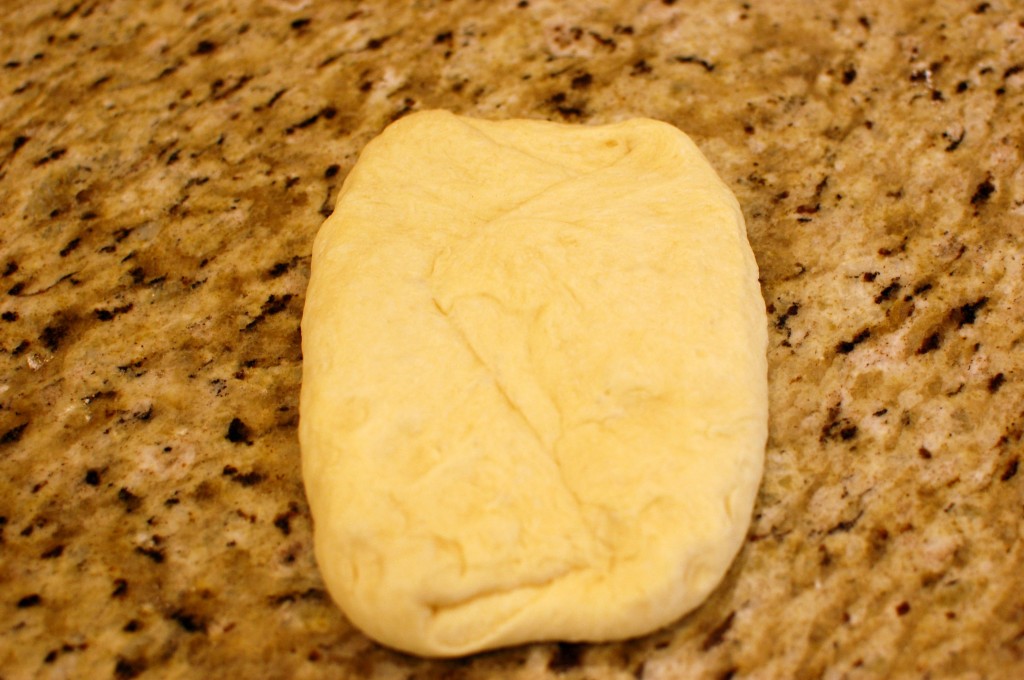
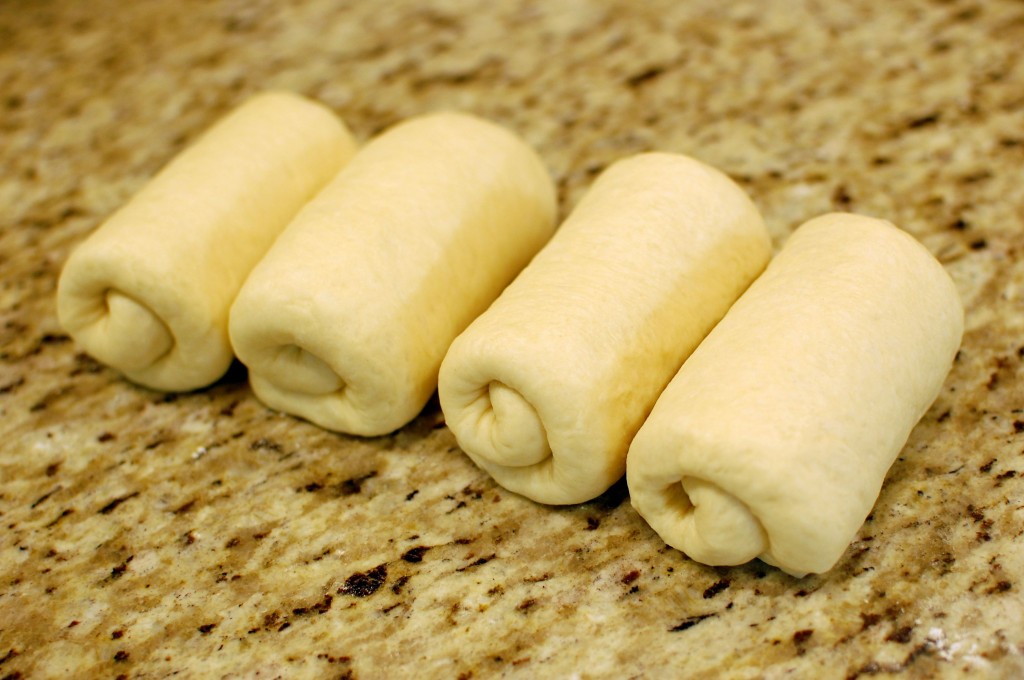
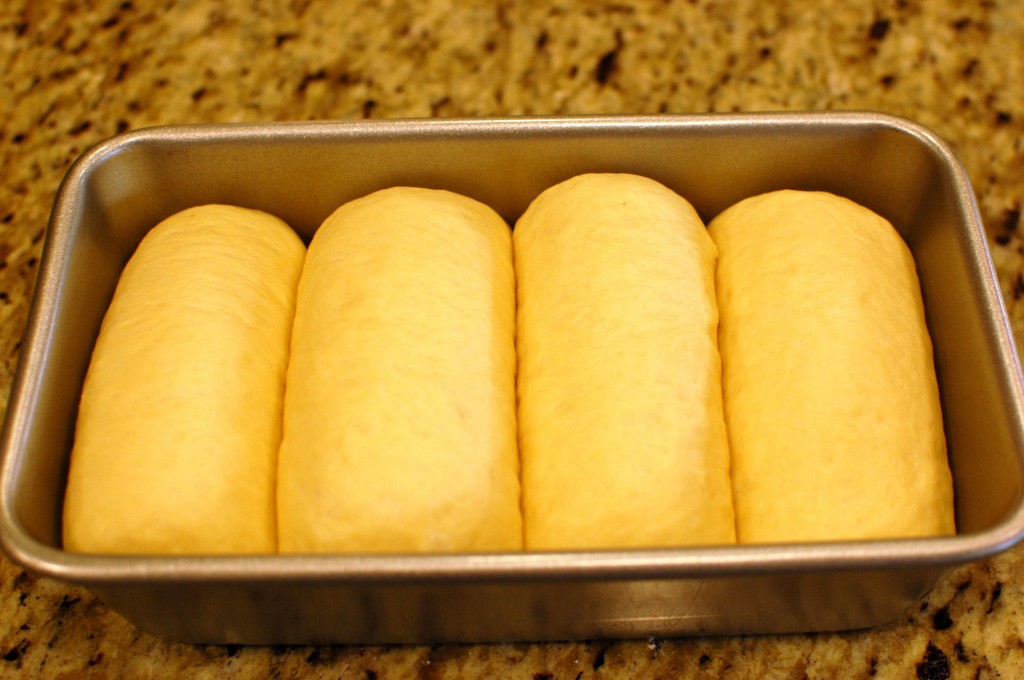
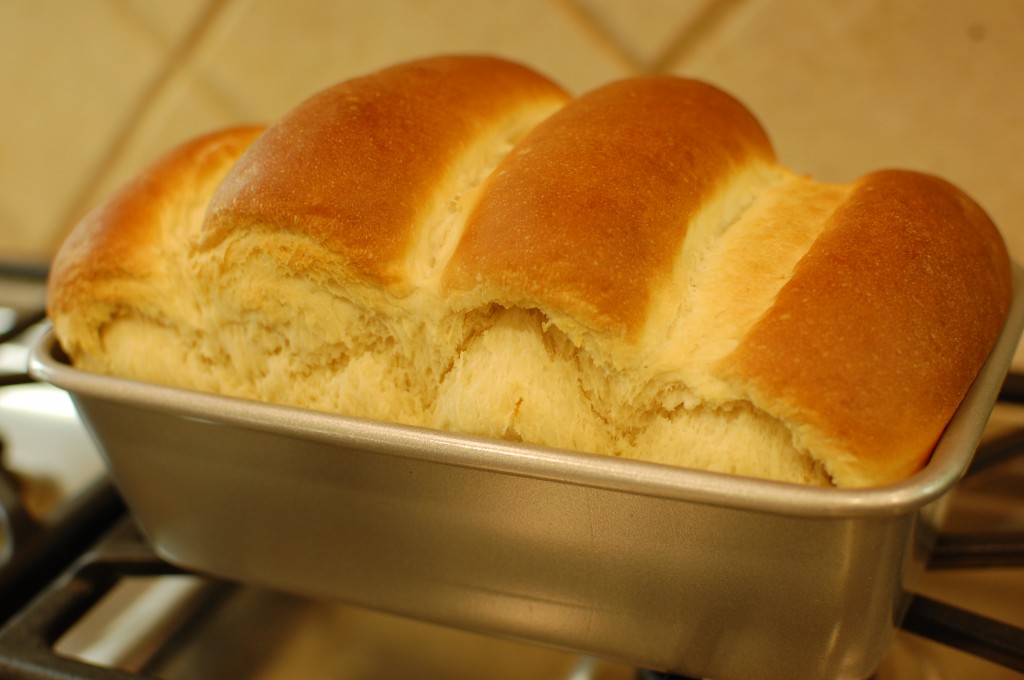
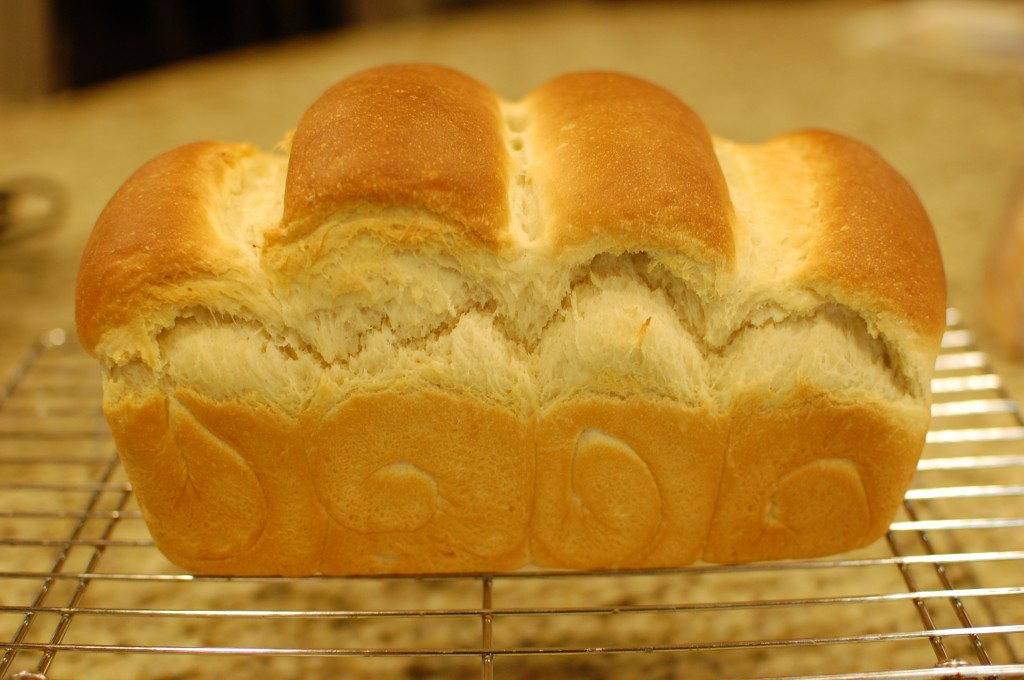


Holy crap, that looks amazing! I can’t wait to try this recipe! Great photography too!
Thanks! Your blog is pretty awesome too!
hi there!!! i just used your recipe last night, after several years since i had decided to quit baking, last night i got a breadmaker and decided to give another shot… i let the machine do the dough, it was sooooo sticky, impossible to handle… to i just threw the dough in a loaf pan and let it rise there for the second time, it kinda shaped itself during the second rise…. it was perfet, suoer soft and delicate taste… i kinda gave a shot in the dark, and it worked… great recipe thanks!!!
hi! if i can use this TANGZHONG in steam buns or chineese buns or siopao so that become soft?
Usually you can add 1/2 c. of tang zhong to most bread recipes to help give a softer, fluffier texture. However, your results will depend on your initial dough recipe.
This is my recipe for steamed bun dough, which I think works very well – it uses a combination of bleached all purpose flour and cake flour to recreate the proper protein balance in the dough. If you can find “Hong Kong flour” – use that instead of AP & cake flour.
http://www.the350degreeoven.com/2013/02/meat/nikuman-japanese-steamed-pork-buns-a-k-a-chinese-pork-baozi/
Hi Paulinha! Yes, it’s a very sticky dough… I think the Tangzhong makes the dough a little bit stickier than you would expect from a traditional bread recipe… but the end results are well worth it. You don’t have to shape it into the ovals if you don’t want that “Asian Milk Bread” loaf look – you can do exactly what you did and just bake it as is if you want a more regular looking loaf. And I agree, the breadmaker really helps to speed up and simplify the process. I’m glad it worked out for you!
Hi Mika, I was browsing the internet for using tangzhong roux using bread machine. And I found yours! do you think I can bake it straight in the bread machine using white bread function instead of take it out and roll?
Evelyn,
I’ve never tried baking the dough straight in the bread machine… if your machine has a “small loaf” function, you might try it… I don’t see why it wouldn’t work. It might turn out with a slightly harder crust, but the inside should be similar.
Thanks for your quick response!:) Since I also don’t want to keep the tangzhong roux, what is the measurement for the flour and water to give half cup of tangzhong roux?
Hi Evelyn, sorry for the late reply.
If you fill up a 1/3 measuring cup only halfway with bread flour, and use 1/2 c. water – that should give you enough tangzhong for just one loaf.
Did you happen to use “bread machine” yeast.? Trying this today, after I get to the store for regular yeast.
Hi Veronica! No, I don’t use bread machine yeast. I just use regular “active dry yeast” – the kind you can buy in a jar on the baking aisle in the supermarket.
I have been hearing a lot about this Japanese bread method but you have explained it the best! Thank you so much. Can’t wait to try it!
Rose,
Thanks! Let me know how it turns out for you!
I love this bread, one of my favorite white breads now. Do you think I can use this as a base for cinnamon rolls? your thoughts on that?
Hi Leah,
Yes – you can use this dough for cinnamon rolls – I have made them in the past with good results. Roll out the dough to a large rectangle, and spread 1/2 c. melted butter over the top. Then sprinkle with the desired amount of sugar and cinnamon before rolling up. Slice into about 16 rounds. Put 8 rounds each into a 9″ round cake pan, cover and let rise for another 30-60 minutes in a warm place. Bake for 15-20 minutes at 375 degrees.
I like to use a cream cheese based frosting: mix 1/2 c. butter, 8 oz. cream cheese, 2 c. powdered sugar, and 1 tsp. vanilla.
Thanks for your quick reply.
Well, since you are experienced baker, I have a few questions that have been bothering me. Why do some bread recipes ask for regular flour while others ask for bread flour? Why some cinnamon roll recipes ask for yeast and other don’t? Which is better? ありがとう!
Hi Leah,
That’s a good question about flour. In many cases, you can substitute all purpose flour for “bread flour” in bread recipes – but your final bread product won’t be quite as good. The reason why, is that bread flour contains a high amount of protein – which is essential in the development of gluten. Gluten is a stretchy protein that helps trap the gas bubbles from the yeast when making bread – it’s what gives bread that “bread-like texture” – if that makes any sense. Other flours, like cake flour, have a very low protein content – which is great for baking fine and delicate textured cakes and pastries. All purpose flour has a more moderate protein content – neither low, nor high – so it is useful for most baking applications.
As far as yeast vs. chemical leavening – If you want a final product that rises slowly, then yeast is the leavener of choice – especially if it is for something that can otherwise end up dense, like bread. Have you ever had Irish Soda bread? This is a bread that is leavened by baking soda instead of yeast, and the final product ends up being a very dense bread loaf – a very different texture than fluffy milk bread or even something like a baguette. For finer textured products, like cakes and cookies, chemical leavening (like baking soda or baking powder) form gas bubbles very quickly, and provide almost instant lift.
So bread flour + yeast is better for making bread, and AP or cake flour + baking soda/powder is better for making cake. Hope that helps!
Many breads of today have both yeast AND chemical leavening. I made this with both yeast and a little cream of tartar and baking soda. It turned out fantastic…
I suppose you could do that… but it’s really not necessary, and I wouldn’t do it. There is such a thing as over-leavening, which can affect the flavor and texture. Yeast breads are very different from chemically leavened breads… and the hybrid may not necessarily be superior.
Hey mika! thanks for this recipe, I tried my hand at baking bread for the first time using this recipe,
so far, it’s looking good! Thank you!
Yours,
Cristina
Dear Cristina,
I’m so glad it worked out! I hope you like the bread!
Hi Mika!
Your recipe sounds great! I’m going to try making this too! I do have a question though: is it possible to make the bread dough without the use of the bread machine? I don’t have one at home and I’m not sure how to mix the ingredients together (in step 3) without the yeast to touch the liquid underneath.
Let me know if you have any tips!
Rina
Thanks so much!
Hi Rina! If you don’t have a bread machine – then there is no need to worry about the yeast touching the liquid underneath – that’s only to give the machine time to warm up before activating the yeast. If you are making the dough by hand, I would melt the butter in the milk (microwave!), and once it becomes lukewarm, add the yeast and let it bloom for a minute or two. Then, mix in the egg… and mix all the ingredients together to form the dough (it will be very sticky). Knead using your hands (or a dough hook on a stand mixer) for 10-15 minutes until you can stretch the dough to form a thin membrane (windowpane effect). Then, cover the dough in a warm place and allow it to rise for about 45 minutes – then punch down and let rise another 30-45 minutes.
crap… i wish i had found this comment sooner… i trashed the dough because i just realized that there was no way that the yeast would have worked if i had just mixed everything together. welp, i learned something today. that is to read XP ill try again tomorrow
Actually, if you mixed it all together, it should still work out just fine. That’s generally how the bread machine works – you keep the yeast separate, then the machine just mixes it all together. If you are making by hand, it’s EASIER and FASTER to dissolve the yeast in the liquid first… but you don’t have to!
AHHHH *digs through trash* lol ill keep that in mind next time
are you supposed to melt the butter first?
Why did you put wet ingrediants first? my bread machine says dry ingredients…
when you let it rise for 30 minutes do you cover it?
where do you put it?
Are you supposed to grease the pan? SO many questions!
Annabel,
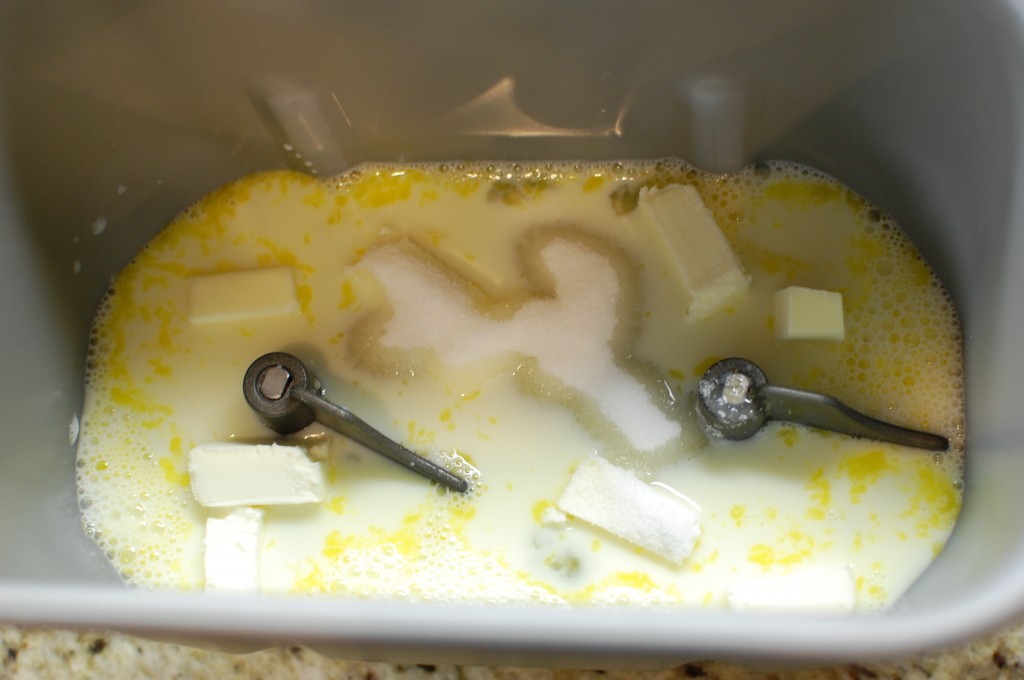
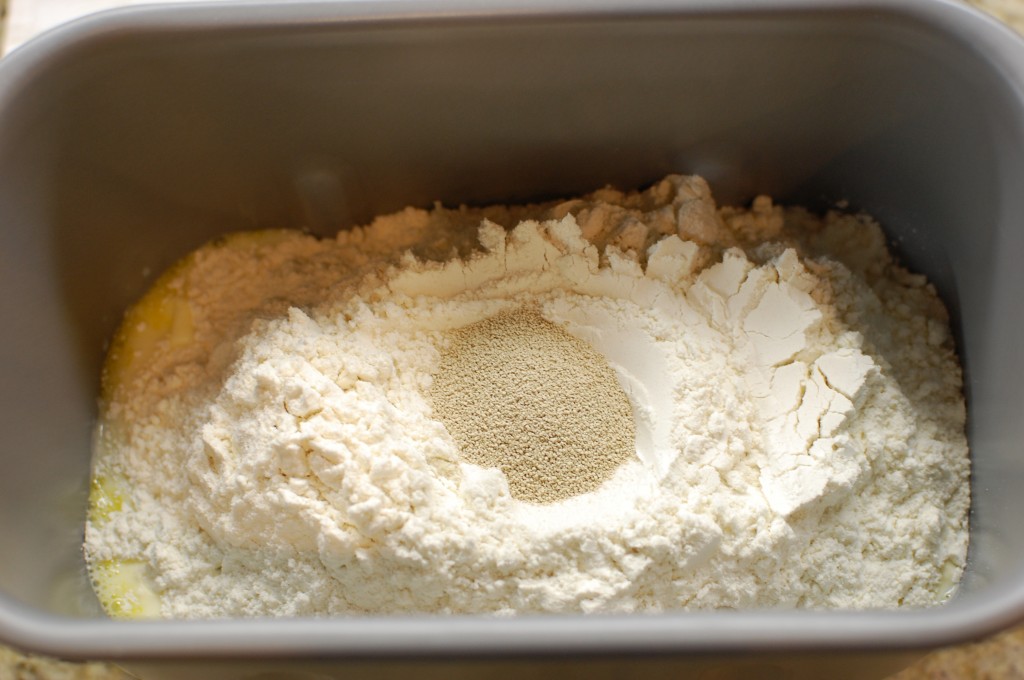
If you are using a bread machine, then no – you do not need to melt the butter first. Typically – if you read your bread machine’s instruction manual – it will instruct you to put the wet ingredients in the bottom, the dry ingredients on the top, and the yeast in a little “depression” (that you make in the flour). The reason for this is so that the machine has time to warm up before combining the yeast into the liquid ingredients. (But my machine is a Zojirushi… so if your machine says otherwise, you should follow the instructions that your machine’s manual recommends.)
After rolling out and forming your loaves, I sometimes do cover the loaves loosely with a little bit of plastic wrap to keep the dough from drying out – but if you are allowing the dough to rise in an enclosed environment (like a cold oven with the light on, or inside the microwave) then you might not need to cover the loaves. My favorite place to let dough rise is inside a cold oven, with the light turned on. The heat from the light bulb is usually enough (in that small enclosed space) to make the environment conducive to rising dough.
I usually spray the loaf pan with a little bit of Pam for baking (non-stick spray with flour added) – just to help encourage the loaf to come out later. I’ve used a really good non-stick pan in the past where I didn’t need to do this, but it never hurts to grease the pan to be on the safe side. Hope this helps!
Sad to say, wet ingredients at the bottom of a bread machines pan are a no-no. The bushing on the shaft for the paddle cannot handle liquids of any sort. You will shorten the life of the bread pan in a huge way. Wipe the pan clean, never use soap and water.
Actually that’s not true – it depends on your machine. The Zojirushi bread machine manual gives specific instructions to put the liquid ingredients in first, at the bottom of the pan. If your bread machine manual says otherwise, then I would follow the instructions for your specific machine.
Does it matter what kind of milk you use? Like one percent low fat versus whole milk? I tried it with 1 percent milk but bread wasn’t as soft and fluffy as I thought it would be
Hi Ann,
The higher fat content milk you use, the softer the bread will be. I normally use 1% myself, since that’s what I have in the refrigerator…. and I’ve never had any issues with that. If you find your bread is not coming out very soft and fluffy – be careful of how much flour you are using to prevent sticking when rolling it out. The more flour you add, the denser and tougher your bread will turn out. Also, make sure you give your bread enough time to rise after rolling (covered loosely, in a warm draft free environment). You also want to make sure you are using real butter, not margarine or “spread”. Hope this helps!
Hi mika, . I can’t wait to try this recipe. We don’t get bread flour here easily but I do have gluten powder with me. Could you tell me how I can substitute 1 cup bread flour using AP flour and gluten.
You have a great site going here
Take care
Lakshmi
Hi Lakshmi,
Yes! You can add vital wheat gluten to regular all purpose flour, and use that as a substitute for bread flour.
Basic method:
Take 1 c. all purpose flour, and REMOVE 2 tsp. of flour. ADD 2 tsp. vital wheat gluten. Now you have 1 c. of bread flour, voila!
To make Japanese Milk Bread:
For the 2 1/2 c. of flour in this recipe, measure out 2 1/2 c. all purpose flour. REMOVE 5 tsp. flour, and ADD 5 tsp. vital wheat gluten. For the 1/3 c. flour in the tang zhong – I wouldn’t bother with the substitution, just use regular all purpose flour.
Hi Mika, thanks for sharing. I wanted to try to make this but only has self-rising flour on hand. Would that be okay to use on this recipe? Thanks.
Hi Meg,
Generally, self-rising flour has a lower protein content, and has chemical leavening agents already added in (baking soda + baking powder), so it’s not the best to use for yeast bread applications. Because of the lower protein content, self-rising flour makes very soft and tender biscuits… and is great for quick breads… but this works against you when you are trying to create stretchy gluten proteins in yeast bread dough). Yeast breads require higher protein content, so it would be better to go with bread flour or at least all purpose flour with vital wheat gluten added. Also, I worry that the fast gas bubbles created with the chemical leavening agents in the self-rising flour will interfere with the texture of the final loaf.
You can try it though… and see how it turns out. It’s possible it might be ok… you never know unless you try, right?
Just today I posted a query on another baking blog about doing the tang zhong method in a bread machine. I have absolutely no response as of this hour. Not wanting to give up my search – I typed in several different versions of tang zhong in my search bar. Voila — here you are!!!!!!!! And — with ALL of the instructions and photos. I will be making the tang zhong tomorrow and baking in Pullman pan with lid for a rectangular loaf — wish me luck!! Thanks a zillion for this information.
Hi Teresa! Glad I could help… let me know how it turns out! (I just bought a Pullman loaf pan and have been meaning to give it a try soon!)
Well let me begin the comment with WOW.
Okay so I have never baked bread at home.I decided to give this recipe a shot because it sounded delicious.now, I don’t own a bread machine, and hand kneaded the dough.it IS greatly sticky.for future readers, I followed the instructions for the bread machinein terms of adding my wet ingredients first, and then doing the yeast. I didn’t even proof my yeast,and just began kneading straight away
The bread still turned out FABULOUS.so fluffy and moist! Your instructions made it so easy!I think I just never need to buy store-bought bread ever again.
Thank you so much for sharing!
Hi Caitlin, Thank you for your feedback! I’m glad it worked out for you… and you are correct, you do NOT need to proof the yeast at all – just mix it straight into the dough.
Excellent soft bread! Recommend greasing pan vrry well so i doesn’t stick. I greased with organic Spectrum shortening. Thanks for great shaping tips,
Hi Mika,
Thanks for this recipe – had great fun trying it out with great success. Just a question, as I do prefer slightly sweeter bread, would increase in sugar affect the rising of dough as I do recall that there is a ratio to work with for better rise of dough with the sugar reaction to yeast. Please can you advise… Many thanks again…
Hi Heidi, You could try adding a little bit more sugar next time – maybe increase by 2 T. increments and see if it has any negative effect on the rising process. You don’t want to add too much sugar, since it might throw off the balance, so I would start by increasing it a little bit each time until it is to your taste (provided the dough doesn’t react funny). If you want a sweeter bread, you might try my Hawaiian Bread recipe, or try the my Coconut Bread recipe.
Hi MIka,
Thank you for all those recipes! I have a question- why can’t we cook the bread in the breadmaker? I have a mini Zojirushi.
Well, you can bake the bread in the bread machine… but you will lose the characteristic shape, and the loaf will end up harder. (Bread machines tend to over-bake delicate bread recipes, like this one.)
Hi
May I know the conversion in grams please?
Thanks!
Hi Grace,
I’m sorry, but I generally don’t measure ingredients by weight – I use standard volumetric measurements like most people in the U.S. (cups, tablespoons, teaspoons, ounces, etc.). Can you find a set of American-style measuring cups? That’s probably the best way to go with this recipe. Sorry!
Measuring by weight is far and away superior to measuring by volume. 25 grams is ALWAYS 25 grams, but one person’s “1 cup” of flour may weigh 3.75 oz while the next person’s “one cup” might weigh as much as 6 or 7 oz! Not only that, but “a cup of flour” doesn’t even weigh the same from one cup to the next when being measured by the same person – I found my “one cup” weighed anywhere from 4.5 to 6 oz, even when using the “fluff and scoop” method from Cook’s Illustrated/America’s Test Kitchen.
Not only that, but measuring cups are NOT standardized in this country. They can vary by as much as 10% more or less than they ought to be. So by all means, give up this silly prejudice we have in this country against weighing ingredients and enter into the 21st century, LOL!
Hi there!
In theory, I agree with you about measuring by weight. But the best way to do things “theoretically” doesn’t always apply to reality! I know for me, it’s much easier to pull out a bunch of measuring cups than lug out the kitchen scale from the cupboard and make my counter top a huge mess by weighing everything out first. I measure everything the same way – fluffing flour before scooping, and leveling off with a straight edge. I’ve never had a problem. I’m cooking and baking… and while some precision is necessary, it’s not O-chem!
Once in awhile, I do get asked by some of my friends and readers abroad for the metric equivalents… but there are so many recipes online already with all of those measurements. One of the (many) reasons why I started this website was to make certain international recipes accessible to the average American home cook. Several years ago, when I began searching for all these foods that I was craving online, I was very disappointed to find the measurements only in metric units, with difficult to understand instructions. It was so frustrating, searching for a recipe, and finding a bunch of partially translated instructions (with a few mystery ingredients listed), and only metric weights and metric volumes listed. So, after much experimentation… I decided to share how to make these recipes… but instead, with the volumetric measurements that 99.999999% of us here in the USA are more familiar with (and with easy to understand instructions – at least I hope people can understand my instructions!)
Sometimes I do weigh things… but most people don’t have kitchen scales, and don’t have metric measuring utensils. So I go with what is common, and what works for most people. (And I’m lazy – I will definitely admit that, because it’s a huge part of the reason why I do things the way that I do!) Alton Brown may not approve… but oh well. C’est la vie!
I really would love to try this recipe, however, my 2 year old cannot eat eggs (anaphylactic shock). Have you ever tried this WITHOUT the egg by any chance? What do you recommened? I know the texture might not be the same. What about using flax or chia gel as substitute?
Hi there. No, I have never tried making this without eggs. But, there are many bread recipes that do not call for eggs… so although it may not turn out exactly the same, it should be fine. You may want to add an extra 3 T. of liquid though to make up for the loss of liquid from the egg. Hope it works out for you!
Hi,
I’m wondering how your bread turned out. Which egg substitute did you use? Flaxseed?
Dear Mika,
When I was a child in the 1960s, my beloved grandma would make billowy loaves of bread in her woodburning stove which was situated in the backyard of her rural Albuquerque home. (She also made flour tortillas on the comal on top) Oh how I loved the taste and smell of that bread! I’ve been trying to duplicate that same fluffy yummy goodness all these years to no avail … until I tried your bread today. This was my first attempt at the water roux technique – I was intrigued by all I had read in other blog posts. Your technique is the most user friendly. I am sitting here now, luxuriating in the taste of this bread spread with butter and honey. I sprinkled sesame seeds on top before I baked it. It looks and tastes and smells gorgeous. It is everything I look for in a loaf of “pan”. Thank you, Mika, for your innovative blog and recipes.
Hi Cynthia,
Thanks for the feedback! I appreciate your comments, and I’m glad I was able to help!
Mika, I tried your Milk Bread & Beef Noodle recipes this weekend, WOW!!! Both were excellent, so easy to follow, I am so glad I found you.
Question: My bread does not look as big in height as yours. I used Bob’s Red Mill Active Yeast, which I keep refrigerated and just bought about a month ago. I’m wondering if the yeast is the problem, or is it the amount of flour that perhaps I did wrong? I measure out in spoonfuls into a scoop type cup, as recommended on baking sites(not the reg measuring cup which I use for liquids), and level it off w/ a knife. This is important to note, as I do not scoop up the flour. However, I tried out my new kitchen scale today & my one cup did not come near 8 oz! Only like 5.7 or so. I was debating whether to go by weight or by my usual method, but since you don’t use a scale, I decided not to.
Any thoughts, please? Much appreciated. Oh, and I did an egg wash before baking cuz I like that glazed look. What an awesome recipe, after looking at so many complicated metric ones, not easy to understand.
Thanks again!
Dear Suzie,
Thanks for the feedback. To answer your question, the height of the bread has more to do with the rising of your dough than anything else… so make sure that your yeast is very fresh, and your initial dough has at least doubled in bulk (or tripled) after the rising process. If you don’t get a very good rise initially, the dough will not rise as much in the oven. Also, once you roll out the dough and fill the loaf pan, you want to make sure you get a good rise there as well.
Regarding the measurements of the flour, I use volumetric measurements for a reason – It is consistent for me, and is the common method in the United States. When I scoop up flour, I fluff the flour up first with the edge of the measuring cup, then scoop, and level off. Do not pack the cup or tamp the cup on the counter. In no way should 1 cup of bread flour weigh 8 oz! Volumetric measurements are NOT weight measurements, so if you are expecting a ratio of 1 cup=8oz, your results will be completely off and you will end up adding WAY too much flour to the dough (which will make your dough heavy and not rise). 1 cup of bread flour should be somewhere around 4.6 to 4.8 oz by weight. So, if you measured 5.7 oz, it sounds like you might be packing your cup with flour and not fluffing up the flour first.
All in all, if you are happy with the texture of your bread, I wouldn’t worry too much about “height”. If all else fails, you might consider the size of your loaf pan. Some standard loaf pans are slightly bigger than others, and if yours is on the slightly larger side, your bread will be spread out a bit more and not quite as high.
Thanks for that info about volume weight–I was slapping my forehead as I read that-DUH! Somehow, I did not read that on any bread site, and probably cuz it “ASSUMED”! When I said it was around 5.7 oz, I forgot to include that this was after I’d measured 2 & 1/2 C, I just weighed up half of that later to make sure. Yes, I do fluff up my flour w/ the spoon before measuring. I am buying another brand of yeast tomorrow to do a comparison on the rising. Overall, I am very satisfied with the texture and taste of this bread. It is very close to the $5(and rising) loaves at the local Japanese bakeries here.
Bottom line–I don’t need to bother with a scale at all, yipee!
Hello Mika,
Thank you so much for your instruction here. It is so helpful. I finally found your recipe which uses US measurement and I made my first Tong Zhong bread yesterday. I added a little more water roux though by accident. It still turned out heavenly good. I can’t believe I can make this kind of soft texture bread in my own kitchen! The recipe is easy and has great result. Also, I found your blog is full of inspiring ideas. Fabulous! I have a few questions here. I am hoping to get your tips when you have time.
1. Is this milk bread recipe for 1 or 2 pound bread? (Just want to confirm. I used Zojirushi Mini (1 pound capacity) to make the dough and noticed that the dough size was taking up almost all space of the pan. So I wonder if I ever want to bake it directly in my bread machine, do I need to cut down the recipe?)
2. I’d like to see if I can add some whole wheat flour to this recipe to make it “healthier” but I have no idea how to adjust the recipe. Can you give me some tips?
3. I have a few bread machine recipes that I like. I wonder how I can apply this Tong Zhone method to these recipes. Is it possible?
Thanks again for your wonderful post. You really save my day and help make my family very happy. I’ll come back to check your blog. Hope you and your family have a wonderful holiday. Merry Christmas!
Hi Judy! I’m glad my recipe worked out for you!
Regarding your questions, this recipe is for a 2 pound loaf of bread. My Zojirushi machine is the full sized 2 pound loaf machine. I don’t think you can halve the recipe… it’s probably best to just remove the dough and finish baking in the oven. If you want to substitute whole wheat flour, don’t go 100%. I would probably do something like 3/4 c. whole wheat flour + 1 3/4 c. regular white bread flour for starters. The problem is that whole wheat flour is harder, and will end up giving you a denser, heavier, drier bread. But I’ve found in most recipes you can substitute whole wheat for about 1/3 of the regular flour without ruining the final product – it may not be exactly the same texture, but should be ok. If you aren’t happy with your results, you can add more or less whole wheat flour the next time around. When I make other bread recipes, I usually just add 1/2 c. tang zhong to the ingredients without making any other adjustments…. and so far, everything has turned out ok for me. If you are considering adding tang zhong to your bread machine recipes, since you are using a 1 pound mini loaf machine, I would maybe only add 1/4 c. tang zhong and go from there. Hope this helps!
I make roux in an 1100-watt microwave. Use a pyrex cup. 1/2-cup room temperature water, 2-1/2 Tbsp flour. Mix well with whisk. Microwave 20-seconds. Stir, take temperature. Will be about 120-F. Microwave 10-seconds. Stir, take temperature. Will be about 135-F. Microwave 10 more seconds. Stir, take temperature. Will be about 145-F. Microwave a final 5-seconds. Stir and take temp. The roux is at about 150-F . This is enough roux for a 1-lb loaf of bread. Cool to below 130-F, add to bread maker.
Thanks for the microwave tip!
Thanks for the brilliant recipe. It worked perfectly in my breadmaker on the enriched dough setting. Only problem is I made it yesterday and have to make another loaf today it was soooo yummy!
I tried this recipe a few times and the bread tastes alright but the bread texture is like cake and crumbles with lotsa crumbs. Any help on what could be wrong?
Hi Vivi,
Something doesn’t sound right with your texture. This should have a soft bread like texture, not at all a crumbly cake like texture. Are you using a bread machine, stand mixer, or making the dough by hand? Also, tell me a little bit more about the ingredients you are using. Is your yeast fresh? Are you substituting any ingredients? Let me know in detail how you are making it, and I will do my best to help you troubleshoot.
I made Tangzhong Cinnamon Swirl Japanese Milk Bread.
I used the traditional Tangzhong Japanese Milk Bread recipe like the one above and adapted it to a Cinnamon Swirl Bread with Craisins.
I didn’t have any plain milk in the house, so I substituted 1/2 cup of buttermilk. Other than that, I followed the recipe exactly from the website.
I used my bread machine dough cycle to knead and for the 1st rise.
But when it came to shaping the loaf, I shaped it into a traditional Cinnamon Swirl Loaf and used this filling below.
What a wonderful dough to roll out and work with. It was so light and smooth. Hardly any snap back when rolling out. A pleasure to work with.
Filling:
1 egg, beaten with 1 tsp vanilla extract (for egg wash inside and outside).
1/2 cup Craisins (Dried Cranberries).
Mix these dry ingredients together, sprinkle as filling:
2 Tablespoons white granulated sugar
2 Tablespoons brown sugar
2 teaspoons Penzey’s Vietnamese cinnamon
2 teaspoons Penzey’s Apple Pie Spice
1 Tablespoon flour
Placed shaped loaf in 9×5-inch loaf pan. Standard rise (about 1 hour) and baking at 350-F until center of loaf reached 195-F.
This was the lightest, highest rising, best tasting Cinnamon Swirl Bread I have ever made. It is so light and fluffy.
This will be my go to Cinnamon Swirl Bread in the future.
Thanks for the filling idea! Sounds delicious!
Thank you very much for the recipe. I have been looking for this milk bread recipe for a while. I tried it out last night and it came out perfect and was a huge hit with the family! My results are at http://kuttybear-toddlerfoodideas.blogspot.co.uk/2013/02/japanese-milk-bread-with-water-roux.html
along with a reference to your website. Thanks a bunch!
Hi Mika,
I’ve been using tang zhong method to make bread. The bread was soft & fluffy on the first day but turn out to be a bit hard the next day. Do you experience the same thing as well? I really not sure why is this happening to my bread. Any idea? =) Thanks!
Hi there! Tang Zhong does help enhance the bread to keep it fresher for longer, but it doesn’t mean that your bread will stay 100% fresh forever. You do need to wrap your bread with plastic wrap, as exposure to air will cause the bread to dry out. As it dries out, it will become harder, as will all baked goods. To keep your bread the freshest possible, wrap tightly with plastic wrap, squeezing out all the excess air, and refrigerate. Microwave for a few seconds to warm it up when you take it out of the refrigerator.
Hi Mika,
Thank you for taking the time to make such a great website.
I was wondering if this recipe is a basic bread recipe? I wanted to make garlic bread sticks and I was thinking of taking this recipe and instead divide the dough into bread sticks. Would this be possible?
Thanks.
I use this bread as a base to make all kinds of things… garlic bread rolls, cinnamon rolls, buns… so absolutely! I would experiment with baking time for bread sticks… they would probably be done quickly. Maybe start checking around 10 minutes or so?
hi may i ask what the difference in baking timing would be if i chose to make rolls instead of a whole loaf?
You can divide the dough into 16 pieces to make rolls – allow these to rise at least an hour in a warm place (covered) first. You can baste the rolls with a little bit of butter and sprinkle with herbs, poppy seeds, or sesame seeds before baking. Divide the rolls between two greased 9″ cake pans, and bake for about 15 minutes at 335 degrees.
You can even fill the rolls (with red bean paste to make An Pan, or with custard to make Cream Pan):
http://www.the350degreeoven.com/2011/10/japanese-hawaiian/an-pan-red-bean-bunbao/
http://www.the350degreeoven.com/2012/02/japanese-hawaiian/japanese-cream-pan-japanese-custard-filled-sweet-bread-buns/
Hi!
I was wondering, why can’t the yeast come into contact with the liquid ingredients?
I’ve never used a bread machine, and only knead by hand. Usually, i will test the yeast with milk to ensure it has not expired. So, in my case, is it ok if i add yeast to milk (and other liquid ingredients) then add flour to knead?
Thanks! Your blog is great and very detailed.
Hi There!
I use a Zojirushi Bread machine to make most of my bread doughs. The instruction manual for the Zojirushi machine states that the yeast must not come in contact with the liquid when in the pan – the machine will mix it all together when the conditions are right. Zojirushi recommends putting all liquid ingredients in the bottom of the pan, followed by the flour, and then the yeast in a depression in the flour. This gives the machine time to warm up, so that by the time the yeast actually IS mixed into the liquid ingredients, the temperature settings are ideal.
If you are mixing by hand, you don’t need to worry about this. Add the yeast directly to the milk, then knead all ingredients together as normal.
Hi Mika,
Which Zojirushi machine do you own? I want to buy same one.
And do you have wholewheat version recipe?
I don’t own machine, so I followed one of hand made recipe online but used wholewheat. Came out so dense even though I used more liquid.
Thank you in advance!!
I have this machine: Zojirushi Home Bakery Supreme Breadmaker
I don’t have a whole wheat recipe. Whole wheat flour is much more dry and dense, so you cannot substitute it for all of the flour. At most, you can maybe sub 3/4 c. of the bread flour for whole wheat… but dont substitute any morre than 1/3 or up to 1/2 the flour, otherwise you run into texture problems.
Hi Mika! I am so happy I randomly got to your page. I think I was researching King’s Hawaiian bread recipes for breadmakers. One of my best friend is the grandson of the owner of King’s Hawaiian, so I told him about your recipe and they were stoked!
I am actually an employee of Zojirushi and I wanted to thank you for using our breadmaker in all these creative ways. I am printing out all your recipes and trying them at home. Thanks again
Hi Rina! Thanks for the message. I LOVE my Zojirushi bread machine (and rice cooker, of course)… it is probably the easiest way to make dough that I’ve found… just dump the ingredients in, and the dough is magically made for you!
Hi ! I had messaged you back in November I think! I successfully made this WITHOUT eggs. I finally had time to make this recently. It took me a couple times to get it just right. I cant believe how soft and pillowy this bread is !!!! I substituted the egg for 3 TBSP of evaporated milk and I added 1/4 cup milk powder. I also increased the sugar to total of 1/4 cup. Oh ya, I also used coconut oil instead of butter. OMG to die for !!! Thanks for your help and your opinion and your recipe My 2 and 3 year old love it !
I’m so glad it worked out for you! Thanks for the update!
Hi Mika, thank you for a wonderful recipe. The bread turn out wonderfully soft; it is still soft on second day.
Would it be ok if I put the dough into the fridge for the first rise… Say over a 24hour period?
This would help to save some time for the bread making on the second day. Thank you!
Yes, I think that would work. Just make sure you bring the dough up to room temperature (for the 2nd rise) before baking.
Hi Mika,
I’m new to this site. Can this bread be baked just inside the bread machine? I’m not sure if you have posted this in the site, but like to ask you for quicker answer.
Thank you, Jane
Hi Jane. You probably could… but the texture might turn out a lot harder on the outside, and the inside might not be as soft. It’s better to use the bread machine just to make the dough, and shape/bake it in a normal oven, using a regular loaf pan. That way, you can control the temperature and how long the bread bakes for.
Hello. I just got self a new bread maker. And when googled brought me to your page. I wanted to make soft fluffy buns.
Your recipe is great! The buns were soft and fluffy! But once I took it out from the bread maker, it is very very sticky. I can hardly mold it into bun shape and put filling… How can I work with moulding the buns into oval shape easily and to put the fillings? I’m afraid using more flour will compromise the taste of buns… Appreciate tips.
Thank you.
Hi there. The dough is sticky, but it shouldn’t be overly sticky. Did you use only 1/2 c. of tangzhong, or did you use more? Make sure you only use 1/2 c. – because if you use too much you will put too much moisture in your dough. You can dust the dough with a bit of flour to make it easier to handle.
I use a knife to cut the dough into pieces, then I flour the pieces and roll out.
Hi mika, i am taiwanese and live in germany for years. I really miss that soft soft milk bread. So i started to learn how to bake the bread. This is the best i have tried through different recipes. Perfect home taste. thank you. . Even my german mother in law is asking me the recipe now.
Could you please advise me, how many gramm is “c” ? I kinda use not enough/too much material during the trying, again, thank you for the sharing.
Hi there! I don’t measure in grams… so I can’t tell you the weight conversion. However, if you have a volumetric measure, 1 cup = 237 mL. If you have access to a US measuring set (cups), that would probably work best.
Thank you for this recipe and for providing so detailed answers to the many questions. I started making bread just this year and this is my favorite recipe (and my family’s). I have a question. One of our frequent guests has celiac disease and, hence, eats gluten-free. I’d love to share this recipe with my gluten-free friends (or at least the gluten-free version that would be as delicious and soft as this one). Any thoughts on whether it is even possible to convert this recipe into gluten-free by using an alternative to the bread flour? (like rice flour maybe?) How would the other ingredients shift?
Hi there! I’ve never made gluten free bread… but maybe a good place to start would be to try substituting the flour in this recipe for Gluten Free Baking Flour instead?
Bob’s Red Mill makes a gluten free flour:
http://www.bobsredmill.com/gluten-free-all-purpose-baking-flour.html
Hi there, thanks for sharing this breadmaker recipe. However, mine is a 1lb breadmaker…. in that case, I’m not sure if I can just half all the ingredients as I reckon your breadmaker is a 2lb? Awaits your reply… Hoping to make this bread tonight!
Yes, you should be able to cut the recipe in half. Let me know how it turns out!
I made this recipe over the weekend with FANTASTIC results! The bread was soft, with a slight chewy texture, just like the bread purchased in the Japanese St. Germain bakery. Thank you for the easy-to-follow recipe and the photos of how to place the ingredients in the bread maker for proofing the dough.
Glad to hear it worked out for you!
I made 2 loaves today. I baked the first one at 335 degrees for 30 minutes, but it was barely cooked and the crust (the part in the pan) was very light. I baked the second loaf at 350 degrees for 35 minutes. The crust was thicker than the first loaf, but the bread was to die for! Lai Jen is right…its very similar to bread sold at St. Germain Bakery and Panya. My next step is to make these into rolls. Thank you so much for this recipe and tutorial.
Great! I’m glad it worked out for you. The temperature (and baking time) you use depends on your oven… if your oven runs a bit cold or slower, then you could try a higher temperature like 350 or bake a bit longer.
OMG! I thought I was on it, thanks to my tangzhong baking experiences, but I had a lapse in judgment and made the tangzhong with only 1/2 cup of water. I was wondering why the dough wasn’t so sticky. The finished products still turned out great! I made hot cross buns and a whole wheat loaf. Thank you again for a great recipe.
You’re welcome!
In one of your comments, you mentioned that you had a Pullman Loaf pan that you were going to try to use. I am trying to create the Shoku Pan that I buy in the Japanese grocery store and wanted to try the traditional Pullman shaped loaf. Can you please tell me if you have tried your recipe in the the Pullman loaf pan, and if so, did you need to modify the volume of ingredients and baking time/temperature, at all?
I believe that your posted recipe is for a 2lb loaf using the Zojirushi Bread Maker dough setting… Does this volume fit in the Pullman pan? What size Pullman pan did you use? Also, when you say that you baked your Japanese Milk Bread in a “regular loaf pan”, what are the dimensions for the “regular” loaf pan? Is it 9″x 5″?
Thank you for any help you can provide! I just found your blog and LOVE it!
Hi there! I haven’t tried the Pullman loaf pan yet… I’ve been meaning to, just haven’t gotten around to it. As soon as I do, I will update my comments with the results and baking time. As far as “regular loaf pan”… yes, I mean a 9″ X 5″ loaf pan.
Hi Mika, Thanks for your prompt reply! In the meantime, I will try your recipe in a 9″ x 5″ loaf pan. Can’t wait! =)
You’re welcome! Now I just have to figure out where I put my pullman loaf pan… so I can give it a try next time…
Awesome! I will really look forward to that! =)
Hi Mika, have u ever tried this on the basic setting? Take the dough out after first rise, shape it, put it back in and wait for it to bake?
I’ve tried many bread recipes in the Zojirushi… the thing about using the bread machine to bake the bread is that you get a really specific type of crust – and I don’t like my Japanese bread to be “overcooked” – I think with this type of bread, you will get a much better result baking in a regular oven. I tend to think of my bread machine more as a “dough maker” than anything else… it’s super convenient for making yeast doughs, but I prefer to have more control (temperature and time) over the baking process so I rarely use the bread machine to bake.
Thank you x5!!!
I love Hokkaido milk bread and I can buy a pre-packaged version with a chocolate swirl but so desperately want to make it myself. I am going to try and do so with your recipe. I’ll post about it on my blog, and of course will credit you for the bread loaf recipe!
You’re welcome! You can use my coconut bread recipe/technique as a basis to stuff this type of bread with any filling:
http://www.the350degreeoven.com/2012/05/chinese-taiwanese/chinese-coconut-milk-bread-chinese-coconut-milk-buns/
Hi…just for info, if the dough is sticky means it will turn out well…so wat u shoud do…use cooking oil put on ur hand and working surface…tadaaa it will b okay
I tried this today. I used the dough cycle in my bread machine but when it was ready to roll, the dough was too sticky that it was impossible to roll into logs. So I dumped the dough into the baking tin. It worked out fine. Yummy too!
I still would love to make it the way you did here tho (in rolls). What can I do to make the dough less sticky? How much flour can I use before the resulting bread will be too dry? Thanks.
It is a sticky dough. You just need to use a light touch – try not to handle it too much, and use a decent amount of flour to dust (up to 1/3 c.) when rolling out.
Hi Mika, may i check with you? my bread turned out hard and not fluffy. I am using a kitchen mixer with a dough hook, do you know what is the recommended time and speeD?
I don’t use a dough hook and mixer, so I can’t give you instructions on that. It should not be hard. Did you add the tang zhong? The tang zhong adds moisture to the dough, so if you leave it out, your dough will be too stiff. Basically, you need to knead the dough until you get a “windowpane” effect (stretch a small flat piece of dough between your fingers, and if you get a thin membrane that doesn’t tear – then your gluten is developed enough so you can stop kneading.).
Hi, do you have this recipe in grams measurement, please? I am always very confuse when the recipe uses “cup” ad measurement. I am not sure what cup to use.
Thanks
Sorry, no I don’t have measurements in grams (or in any weight). I use traditional American volumetric style cups:
1 cup = 236.6 mL if that helps.
You can purchase a set of volumetric measuring cups online:
American Measuring Cup Set
OMG !!! I was going through some website and saw this recipe and decided to try it out. I made it the Saturday night for Father’s Day and half of it was gobbled up by the family that same night. I ended up preparing another batch Sunday evening for my friends at work. They were AMAZING!!!!
Thanks so much – I’m glad your family and friends enjoyed the recipe!
I seem to have ran out of milk and I wanted to make this for my mother’s birthday…is it okay if I use coconut milk as a substitute?
Yes, you can use coconut milk! In fact, that’s a substitution I make all the time, and it turns out great!
I have been making bread from the bread machine and stand mixer. Always made decent bread but always missing something to make the bread softer and lighter. Nothing I have tried has ever worked until now. Using the Tangzhong method has turned my bread into something I have dream of for so long. It rises so much more, is so much lighter and the weight is half what the other bread weights.
That’s great! Glad I could help.
Hi Mika-san
This bread is now a staple at our home. Thanks a lot for sharing these recipes in a simple way.
Question: can I substitute whole wheat flour in place of the bread flour while using the tang Zhong made from bread flour?
Thanks
I think you can… but I haven’t tried it yet. If you want to give it a try, I would start with only substituting 1/3 (33%) of the bread flour with whole wheat flour. If that turns out ok, you can probably go up to 50% whole wheat flour…. but I wouldn’t go 100%, otherwise it will affect the texture and you will end up with a drier, denser bread (not fluffy).
Hi Mika,
Is the butter right out from fridge or in room temperature? Thanks.
I usually use butter straight out of the refrigerator… but my bread machine warms up the ingredients before kneading. If you are mixing by hand or using a dough hook on a stand mixer, I would go with room temperature butter. If you are using a bread machine, then cold butter is fine to use.
Thanks for the quick reply. I’m using bread machine and it specify room temperature in the manual, but I will try both to see which one comes out better. Another question comes up while I go over the manual, below is my dough cycle, does it look right to you? I am totally new to baking (and cooking)…
Dough/Pasta:
To begin: The ingredients are kneaded for the first time (5 minutes)
At 1:25, the dough rests for 5 minutes
At 1:20, the dough is kneaded for the second time (20 minutes)
At 1:00, the dough begins to rise (60 minutes)
At 0:00, the dough is finished.
Thanks again.
That sounds pretty similar to what my machine does… although the basic dough function in my Zojirushi is a bit longer, 1 hour 50 minutes (I think because it has a preheat/ingredient warming cycle). So maybe start with room temperature ingredients in your machine, if yours does not have the ingredient warming step.
Hi Mika,
Today I try your japaneese milk bread. Small question, since you do not use the metric system, I have a hard time following… 1 tsp must be teaspoon? 1 T butter and sugar, is what? tablespoon, I guessed?
Any way to “translate the measurements in grams?”
Thanks
Yes, “tsp” is the standard abbreviation for teaspoon. “T” is the standard abbreviation for tablespoon. No, I’m sorry – I do not have weight measurements for this recipe, as I use the American volumetric system. But here is the volumetric equivalent in metric:
1 T = 14.8 mL
1 tsp = 4.9 mL
1 cup = 236.6 mL
Sorry! Hope this helps.
This bread recipe is absolutely delicious! My family loves this bread and often request that I make it. Every time I bake, they always ask me if I’m making this bread recipe! Thank you for posting such a wonderful recipe!
Can I make dough ahead of time & refrigerate it?
You can make the dough the night before… just make sure you bring it to room temperature before using.
Hi Mika,
What size of loan pan do you use? Thank you.
Amy
9″ X 5″ (just the standard loaf pan size)
Thank you very much !
Been experimenting some more and replaced milk with buttermilk in this recipe. Get a better rise and the results are great.
The bread last longer, stays fresh and moister longer. The following link shows this and more.
http://www.almanac.com/forum/recipe-forum/natural-preservative
Enjoy.
amazing! A beautiful success at first try, only obelisk I had gotten a nicer rise out of it. But I tried a different recipe yesterday without the tangzhong, and what a difference! Light, fluffy and so flavorful! I’ll be sharing with my baking circle (trio more like) tomorrow, thank you so much for this easy and tasty masterpiece!!
I’ve been using this recipe for over a year now and I feel like I have to (finally!) leave a comment — this bread is sooo good! I keep coming back to this, making it for weekend brunch, dessert for dinner parties, or just unapologetic snacking. Thanks so much for sharing
You’re welcome! Thanks for the comment. I’m glad that I was able to help!
why is it that the bread stays so soft , but when you make rolls they don’t stay as soft?
When I use this recipe, I find that the rolls do stay soft too… but keep in mind rolls will go stale much faster because they are smaller and technically have a higher surface area to volume ratio.
OMG! Finally, I found the best Japanese milk bread a.k.a Hokkaido Bread.Its soft, not sweet, the texture is like velvet. Thank you for sharing this delicate wonderful recipes. Its so easy to follow, even though i don’t have bread machine.
THANK YOU SOOO MUCH for this recipe!!! I’m a member on Facebook of a bread machine recipe cite that offer a lot of advice on bread making and have the Tangzhong recipe. Unfortunate, it’s in metric and I do not have the weighing machine. My family LOVED the bread. I didn’t shape it because I didn’t have the time! jaja I’m going to do another loaf, but this time, I’m going to put garlic!!!
Yum… garlic bread sounds really good!
Hi Mika: Thanks so much for the recipe! I can’t wait to use your techniques! Are you on instagram?
Hi Mika,
Thanks so much for the recipe, the tangzhong really made a difference. However the dough was sticky so when I fried it it had bumps instead of a smooth surface. I also tried to improvise the glaze using corn flour and normal granular sugar but the corn flour tasted a bit raw, any ideas so I could improve?
Hi there. You are commenting on my bread recipe… and it is sounding like you are actually having questions/referring to my glazed donut recipe?
I’m not sure why you would have bumps in the donuts… my only thought is if you allow the dough to rise for too long (especially without punching down) you could be generating too much oxygen bubbles in the rising process? Maybe try a shorter rise next time.
You shouldn’t put any flour or cornflour in the glaze… if you don’t have powdered sugar, then it’s better to pulse regular flour in the food processor or blender to make it really really fine, and use that instead. (But powdered sugar is best).
Love your blog
Hello Mika,
Great work, just tried making Japanese Milk Bread. It turned out fine. Keep it up
This was so good and the directions were so easy to follow. Thank you for posting and I will definitely be making this over and over again for my family.
Thanks!
Hi Mika
This looks amazing! Will give this a go. Can you use the water roux when making yeast doughnuts?
Hi there! Yes, you can use the tang zhong when making donuts… here is my recipe:
http://www.the350degreeoven.com/2012/05/pastries-pies/homemade-glazed-donuts-krispy-kreme-doughnut-copycat-recipe/
these doughnots were the best recipe i have used so far, i will never search another one!
Hi i was wondering how long do you cool your tangzhong and what temperature should it be at
I just leave it at room temperature until it cools… you don’t need it to be cold, but it shouldn’t be overly warm or hot to the touch.
How long must we cool the tangzong is it coolit until its lukewarm or body temperature
Yes, mildly lukewarm or cooler is fine.
help my dough very sticky and ky dough keeps breaking i have been kneadong ot for a hour i leave in singapore it is very humid and hot
Umm… not sure I understand. Is your dough sticky, or is it too dry and keeps breaking? It should be a little bit sticky. Also, I don’t think you need to knead it for an hour if that’s what you are doing….
I made your krispy cream doughnuts, which were all gone before dinner they were Fantastic! , mental note to self make dinner first next time, and decided to give this a try with the left over tangzhong to have fresh bread with dinner…. .OMG OMG!!!! it was the biggest hit out of all the recipes i have used, i even messed up and used 4T of butter, and i make fresh bread or rolls for dinner almost every night. This has been requested to be the bread for dinner every night. Thank you so muh, you truely are a food godess. do you have a website with other recipes? i would sure love to try more of your recipes.
Hi Kim. Thanks – I’m glad to help! This is my main website, and you can access the full recipe index by clicking the “recipe index” tab (click it instead of just hovering to see the drop down), or you can use this link:
http://www.the350degreeoven.com/recipe-index/
can I use unbleached all purpose flou?
Yes. I like bread flour the best for the higher protein content (helps develop more gluten for the bread-likes structure), but AP flour will work also.
So we just got the zojirushi bbpac20 bread machine for Christmas and I’ve made this loaf twice! Delicious!! I even tried baking it directly in the bread machine. Baked it on the regular basic light crust setting and it came out great!! Granted it didn’t have the traditional “look”, but it still had the light fluffy texture and yummy taste! Thanks for this recipe!!
Hi Mika,
I want to use the timer to make fresh bread for the family for breakfast. Can the Tongzhon be left in the pan overnight? And if egg is left out what would be the result?
Thanks
Well, I would probably refrigerate it overnight. If you leave out the egg your dough might not have exactly the correct texture… if you have an egg allergy and need to omit, you can try substituting the egg with 2 T. water + 1 T. soy flour.
do you have another recipes that use Zojirushi Home Bakery Supreme Breadmaker to make? I bought the machine but only been making your Japanese Milk bread.
I mostly use the bread machine to make dough… I like the way the machine will mix, knead, and rise the dough for you… which makes the primary function of it as a “dough maker” in my house. Did you machine come with a recipe book? YOu can check out some Zojirushi recipes at the link below:
https://www.zojirushi.com/app/recipe/breadmakers
love this BREAD?
Can kefir be used in this recipe?
You can try it? I don’t see why not…
Can I use instant yeast? Are instant and active yeast can interchangeable? Same 2 Teaspoons?
Instant and active yeast are not exactly interchangeable. But I think you would be ok to use instant yeast for this recipe… the dough may rise a bit more quickly though.
Hi Mika,
Thank you for this recipe. I’ve made this bread several times and it has always turned out well. For those who like to weigh ingredients, I use 10.6 oz flour (300g) in the bread and 1.5 oz flour (43g) in the tangzhong. I use instant yeast mixed into the flour and it works fine.
I don’t have a bread machine. I use a “low-knead” technique – stirring with a spoon at first and kneading by hand after the dough has risen once.
FYI – The page for the donuts doesn’t load. It comes up blank.
Just made the Japanese Milk Bread. OH MY GOODNESS! One of the best breads I’ve made and I’ve made a lot! Easy to read directions, great photos.I made several biscuits and added poppy, sesame and caraway seeds to the dough before shaping each one. Some seeds on top. Will be making the loaf soon .I made the dough in my bread machine and baked the biscuits. This bread is the kind that you can add cheese to or seasonings and it will just make it better. I don’t usually follow people’s blogs, but I will with yours. I like that you answered so many of the reviews. Have told all my friends about your blog. Happy baking.
Thanks! This is a super adaptable recipe… coming up with your own variations is so great and truly makes it your “own”.
Hi Mika,
I followed the instruction and used the same bread machine you used. The dough came out too sticky to roll. It all stick to the rolling stick.
It is a very sticky dough. But make sure you only used 1/2 cup of tangzhong… the tangzhong recipe makes double and some people have accidentally added the whole amount. Use a little bit of flour to roll out the dough, dust as lightly as possible.