Fresh cannolis are one of my favorite Italian (Sicilian) pastries… crisp flaky pastry on the outside, sweet creamy filling on the inside… yum! Good cannoli are hard to find, though… not very many places around here sell them fresh, and nothing is worse than taking home a soggy cannoli! My solution, of course, was to figure out how to make them myself at home, so that I can have fresh cannolis whenever I want!
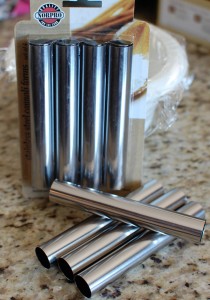
To make cannolis, you will need some kind of food-safe rod to wrap the dough around before frying – this gives the cannoli shell its traditional tube shape. You can use wooden dowels cut to size… but the easiest method is to buy Stainless Steel Cannoli Forms from a specialty store or online. These metal cannoli forms can be fried (or even baked in an oven), are dishwasher safe, and can be used for a variety of pastries and treats. You can make do with a set of 4, but I found it easier to roll a bunch of cannoli shells all at once… so I bought two sets (for a total of 8 cannoli forms). At about $6 per set, it wasn’t too expensive, so I just bought extra.
There are a variety of fillings that can be used for cannolis. Generally most recipes will call for ricotta cheese. I’ve seen some recipes also call for whipped cream, cream cheese, custard… I’ve even seen some delicious looking savory cannoli filling recipes. For the traditional sweet dessert cannoli, I like to use a combination of (drained) ricotta and mascarpone cheese, sweetened with a little bit of sugar, flavored with vanilla. You can flavor your cannoli filling with vanilla, cinnamon, or even grated citrus peel – whatever you like!
If you would like to make your ricotta cheese from scratch, see my Ricotta recipe.
Cannoli shells:
- 2 c. flour
- 1 tsp. cinnamon
- 2 T. shortening (or coconut oil)
- 1 T. sugar
- 1/2 tsp. salt
- 1/2 to 3/4 c. Marsala wine
- 1 egg white (to seal edges)
- oil for frying
Cannoli filling:
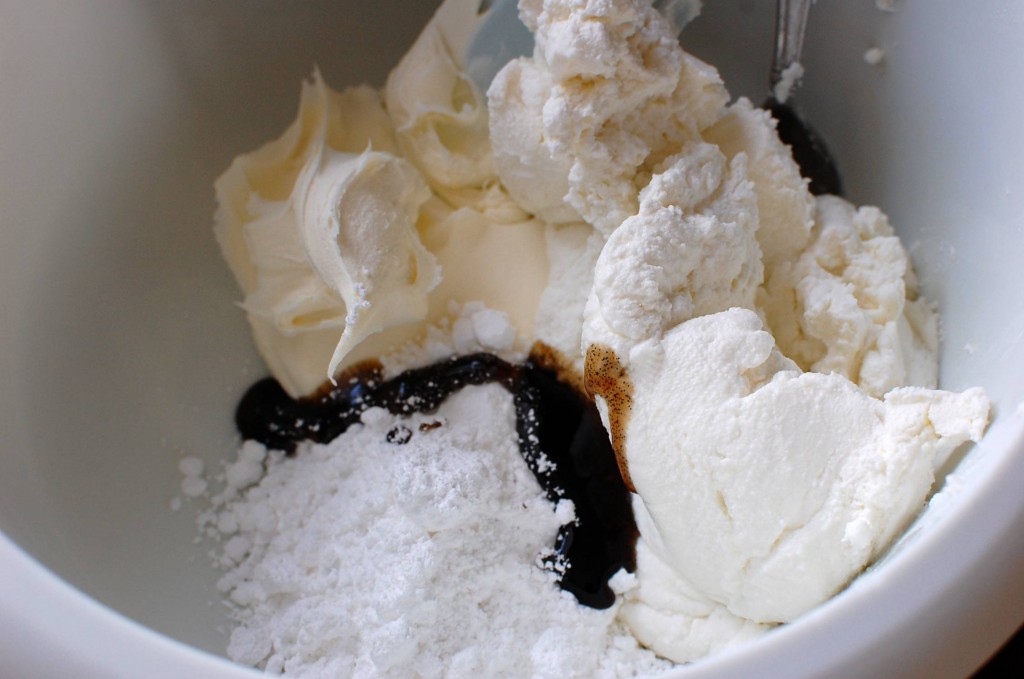
- 16. oz. whole milk ricotta
- 8 oz. mascarpone cheese
- 1/2 c. powdered sugar
- 1 tsp. vanilla paste
- powdered sugar for sprinkling
- mini chocolate chips or chopped pistachio for garnish
- Stainless Steel Cannoli Forms
- 3.75″ to 5″ diameter round cookie cutter (or use a rice bowl)
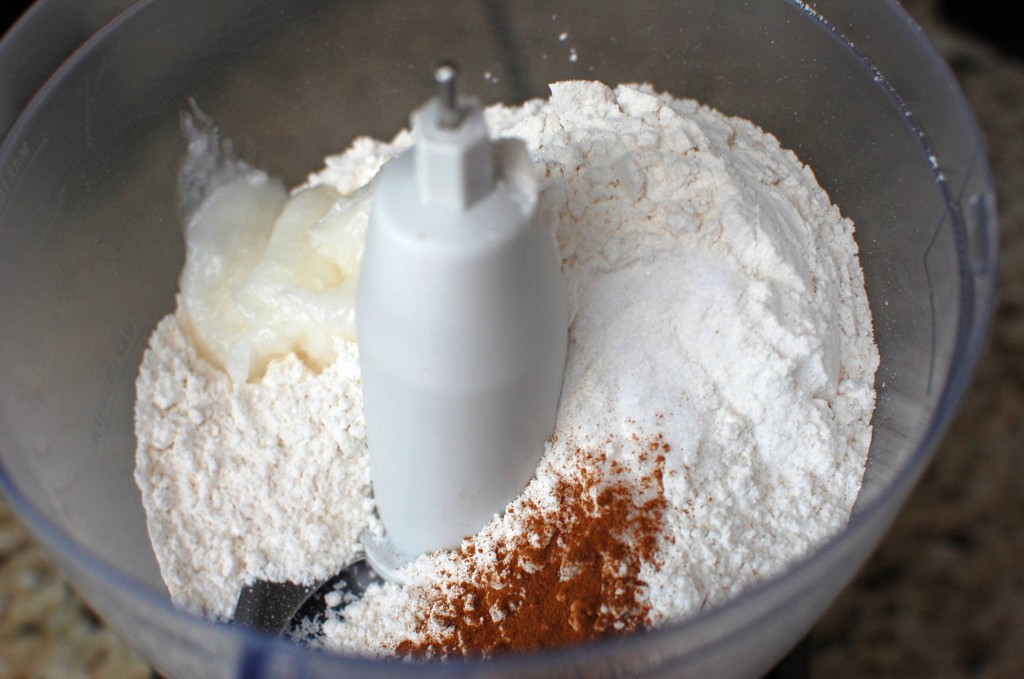
1. First make the dough. Put the flour, cinnamon, shortening, sugar, and salt into the work bowl of a food processor. Pulse for several seconds until combined, and the texture of fine sand. (I used coconut oil. Yes, I know that’s not traditional, but I figured… coconut oil… shortening… lard… what’s the difference? For the small amount being used here… just use whatever you have on hand.)
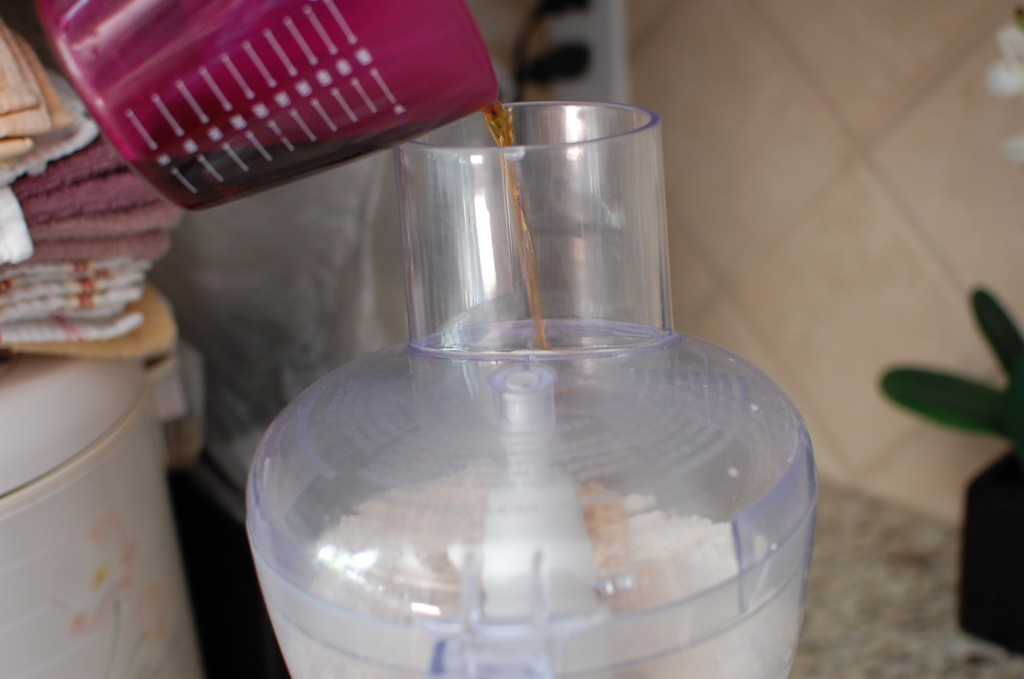
2. While the food processor is running, pour 1/2 c. Marsala wine into the chute. Check the texture of the dough. If too dry, continue to add Marsala wine, 1 T. at a time. (4 T. = 1/4 c.) Do not add any more than 4 T. otherwise your dough will probably be too watery, especially if it is a humid day. (This time, I only needed to add an extra 2 T. of Marsala wine, for a total of 1/2 c. + 2T. wine in the dough.)
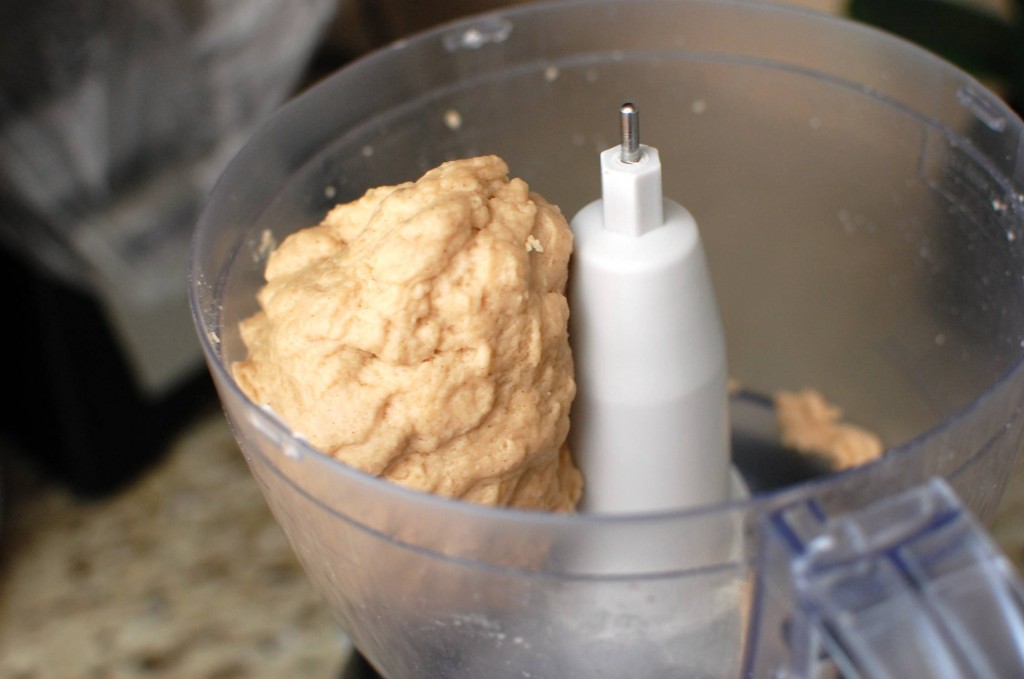
3. You will know the dough is ready when it forms a ball and begins to spin around the work bowl. Remove the dough to a bowl, cover with plastic wrap, and allow to rest for 1-2 hours at room temperature.
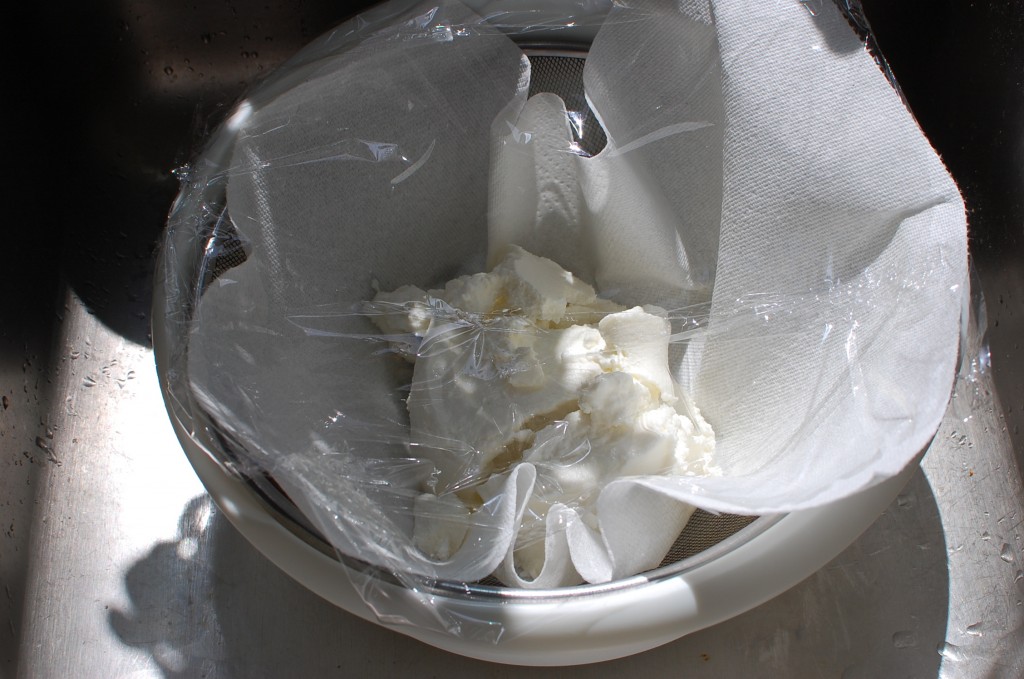
4. Meanwhile, set the whole milk ricotta over a paper towel lined colander, cover with plastic wrap. Allow the ricotta to drain in the refrigerator (over a bowl) for a few hours while the dough is resting.
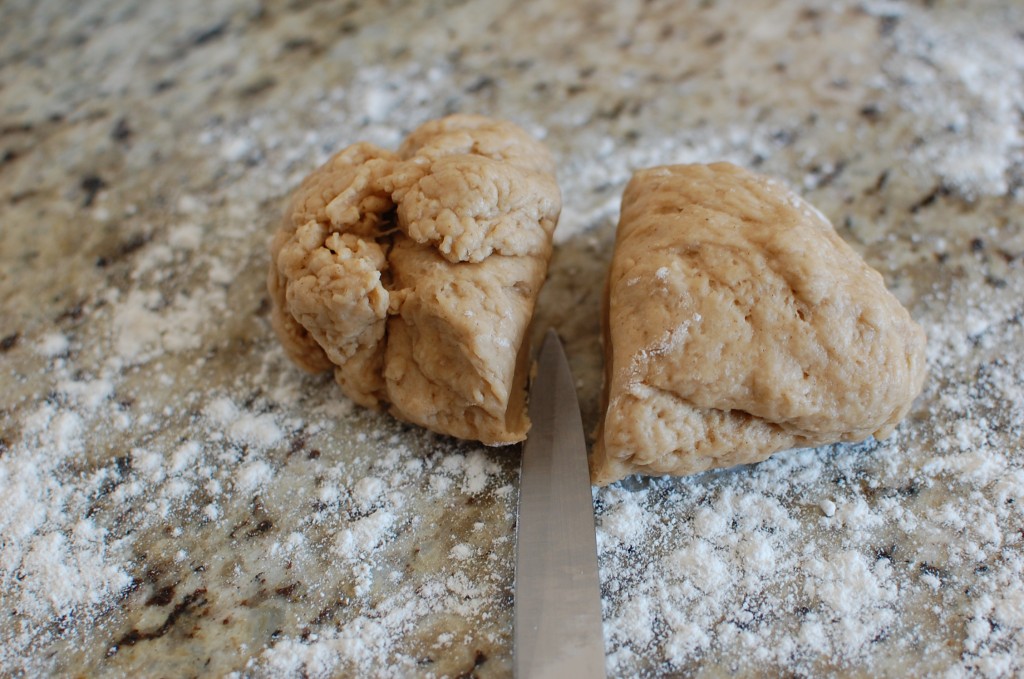
5. After the dough has rested, turn it out onto a floured surface, and cut in half. Set the other half of dough aside, and cover with plastic wrap.
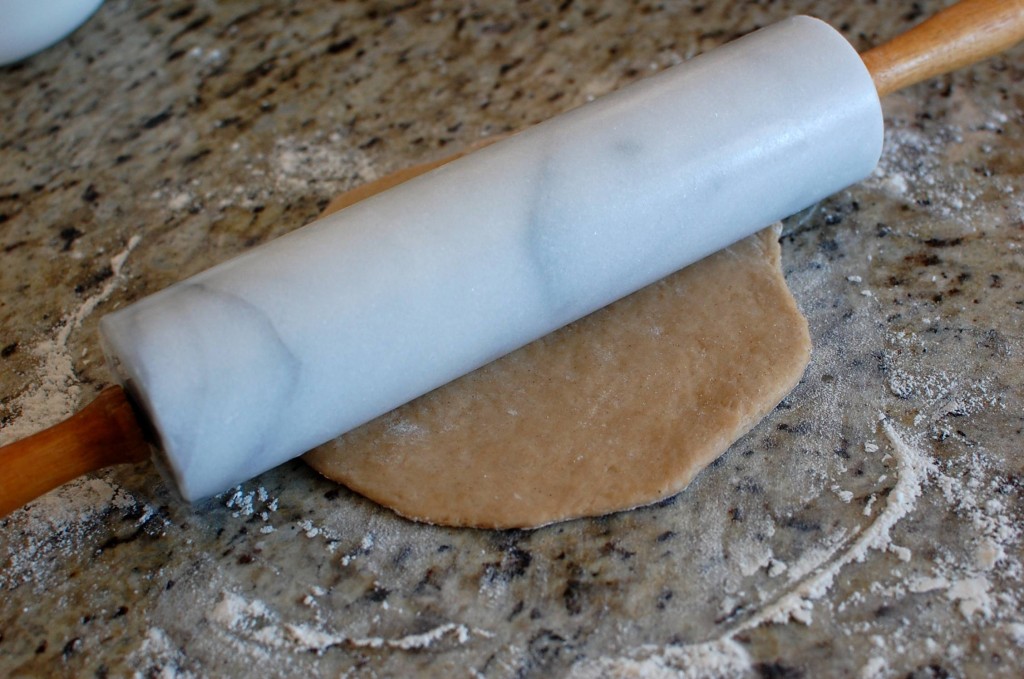
6. Flouring (lightly) as you go, roll the dough out very thin.
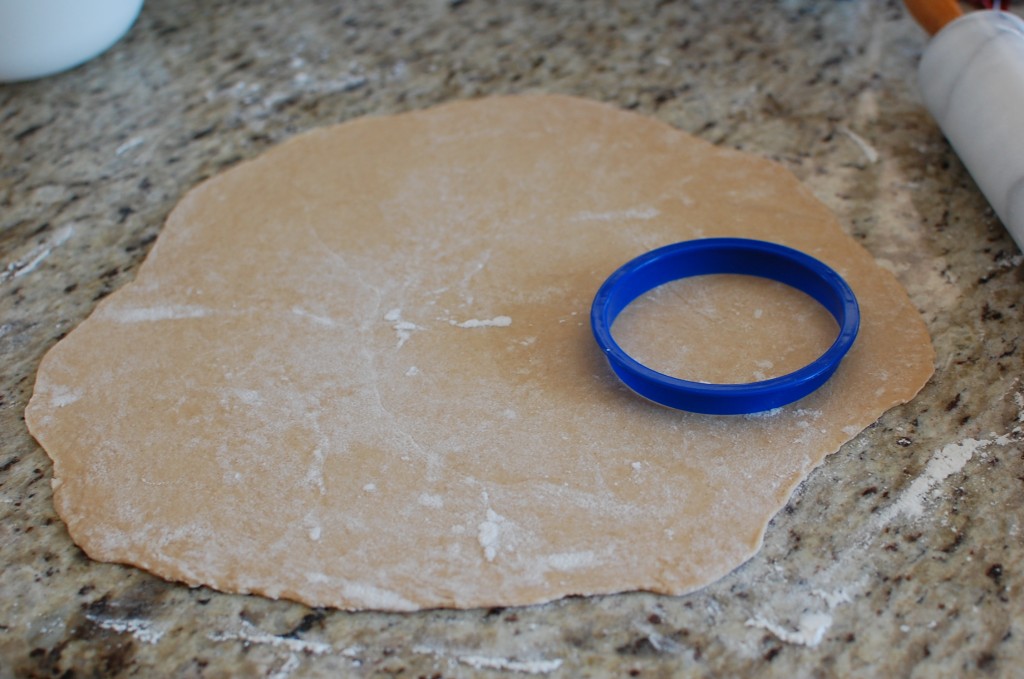
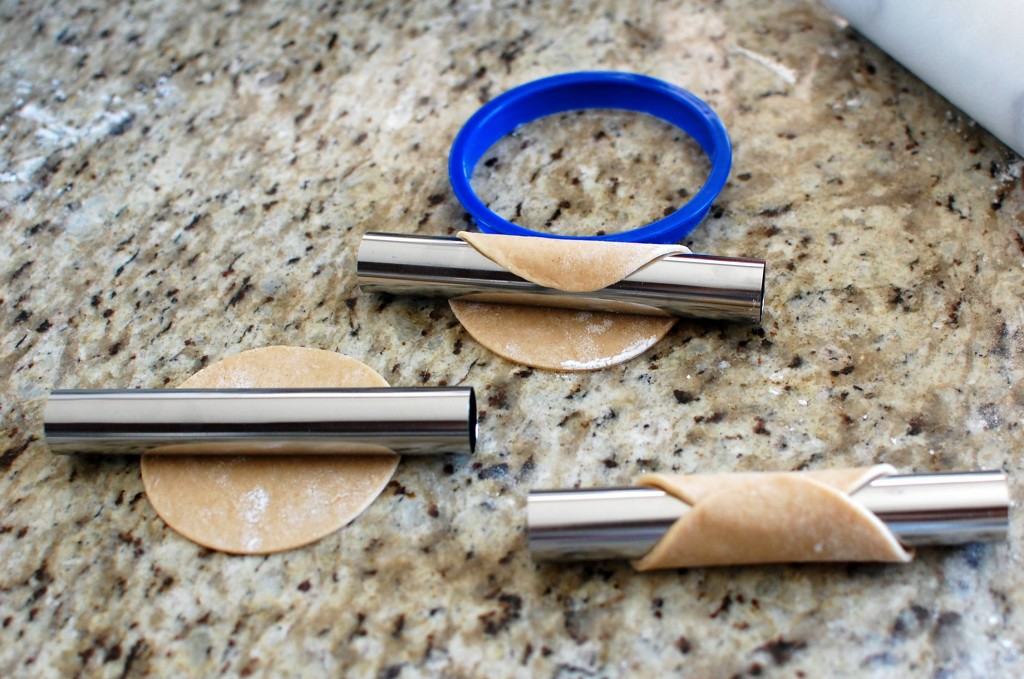
7. Make sure to loosen and flip the dough over several times while rolling, and make sure when you are done, the dough is loose and not stuck to the counter. (You will notices that as you roll the dough, it retracts somewhat.) Cut out as many circles as possible. How big? Up to you. I used a 3.75″ diameter cookie cutter to make mini cannolis. If you want them larger, use a larger cookie cutter, or even a small bowl turned upside down. As long as the diameter of the circle is shorter than the length of the cannoli forms, you should be fine with any size.
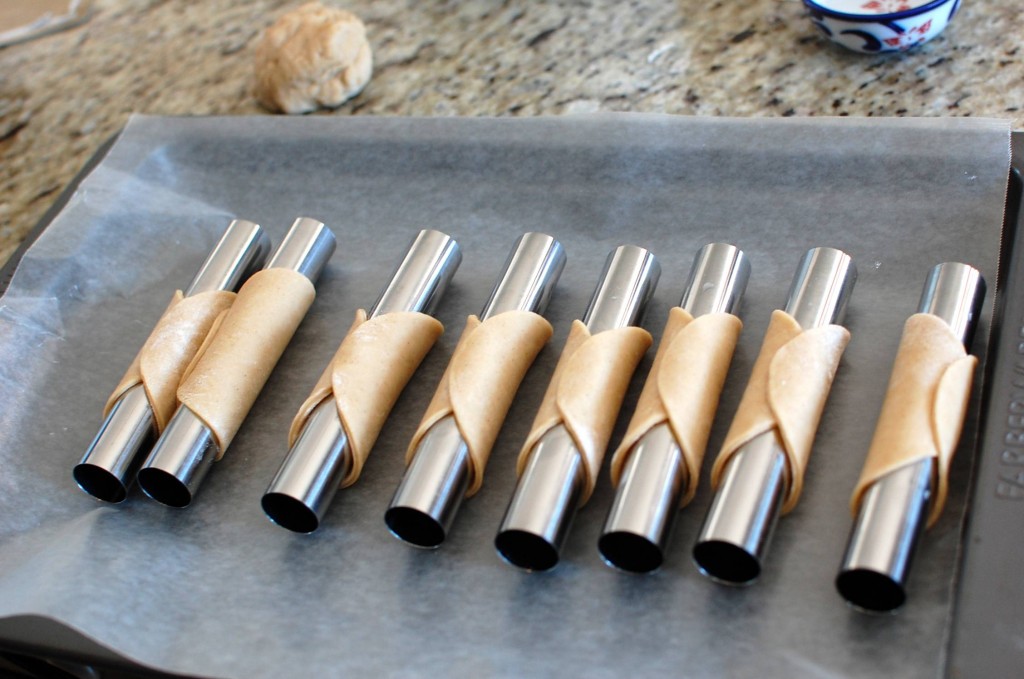
8. Place the tube across the dough circle, and roll the dough to cover the cannoli form. Use a small amount of egg white as “glue” to seal the edges together, and press gently to seal.
9. Once you have covered all of your tubes, set about 1″ frying oil in a skillet to heat over medium. (You can save and re-roll your scraps, repeating the process with the cooled tubes after you have finished with the first batch.)
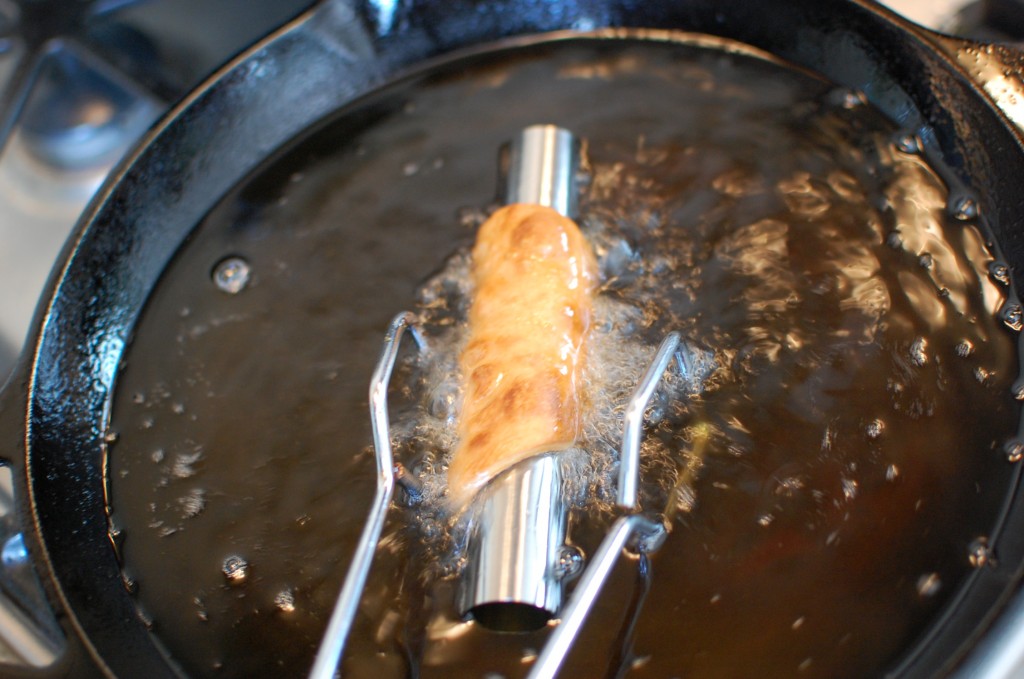
10. Using tongs, drop one tube into the hot oil (seam side down) and hold it there for a few seconds. Keep the tongs clamped to the sides of the cannoli form, and turn it slightly, to allow all sides to brown evenly. You want to achieve a golden brown color. (If you don’t hold the cannoli down, it will rotate to the heaviest side, and stay there. By holding onto it, you ensure that: 1. you can rotate it evenly so all sides cook, and 2. you keep the cannoli adhered to the tube – some of them will have a tendency to puff up and unseal, forming a flat pancake instead of a tube.)
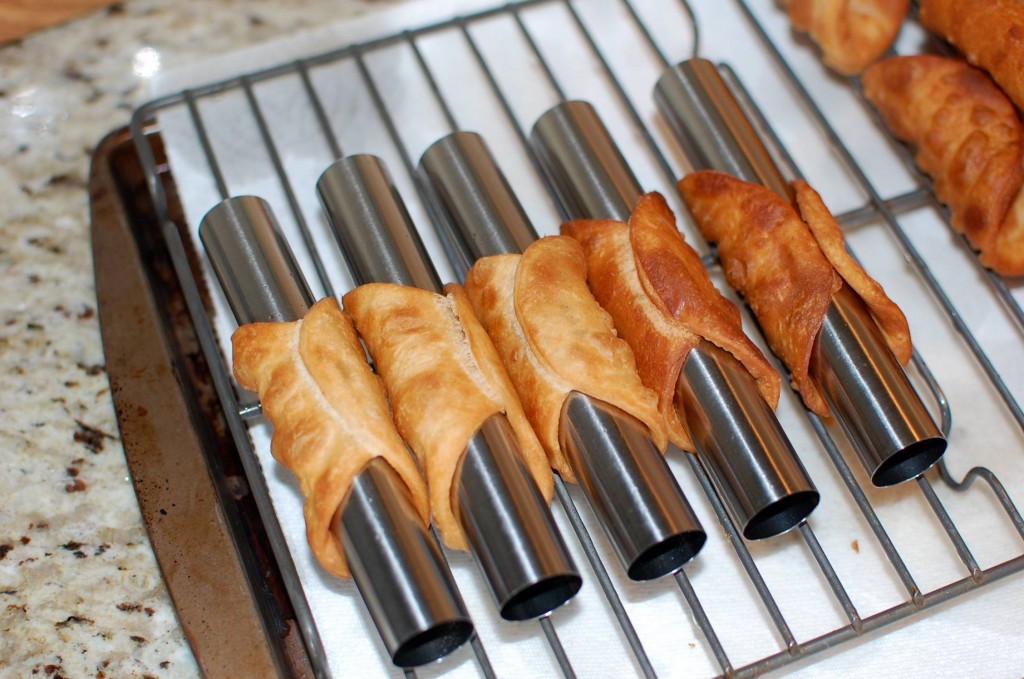
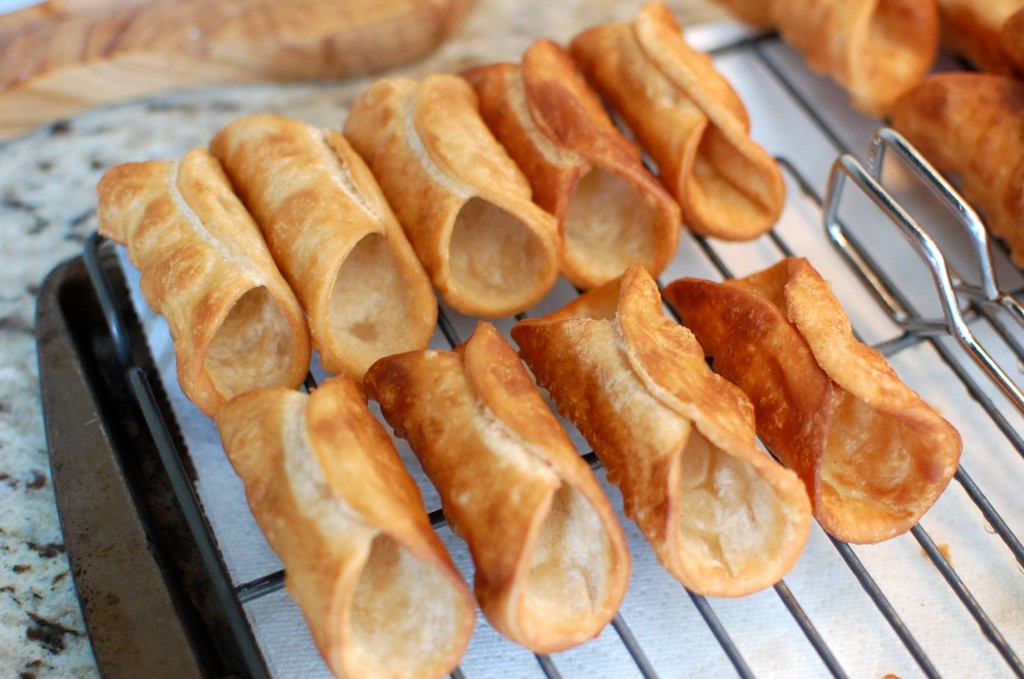
11. When golden brown, remove to a rack to drain and cool. Be careful, as the metal tubes will be hot. When the tubes cool, slide them out of the cannoli forms, and reuse with the remaining dough.
12. Allow the cannoli tubes to cool thoroughly.
13. Mix the drained ricotta, mascarpone, powdered sugar, and vanilla paste. (If you don’t have vanilla paste, you can use vanilla extract instead, or the scraped insides of a vanilla bean.) Other flavoring ideas: lemon or orange zest, or cinnamon, or mini chocolate chips.
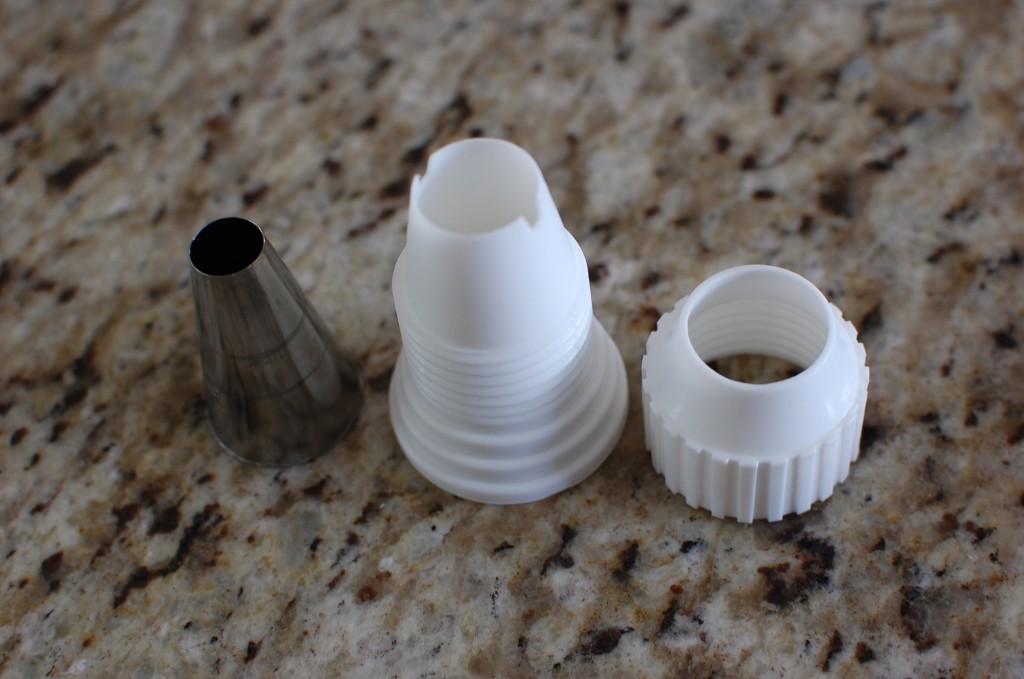
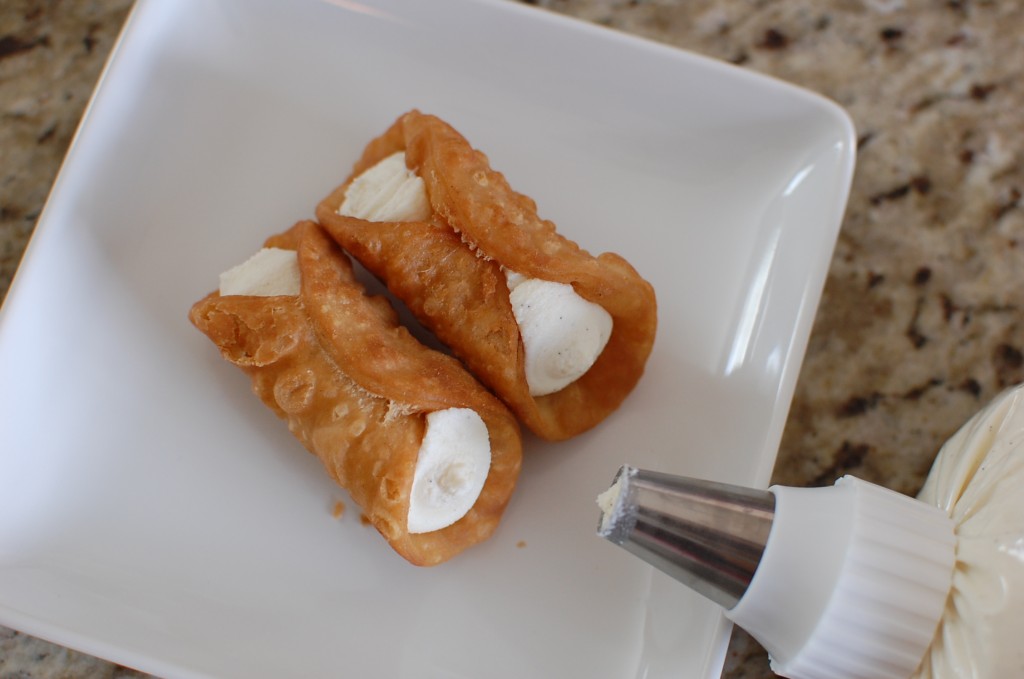
14. Cut the corner off a gallon sized ziplock bag. Stick a large mouth pastry tip into the corner. I like to use a large pastry tip with a coupler – it makes the tip more stable.
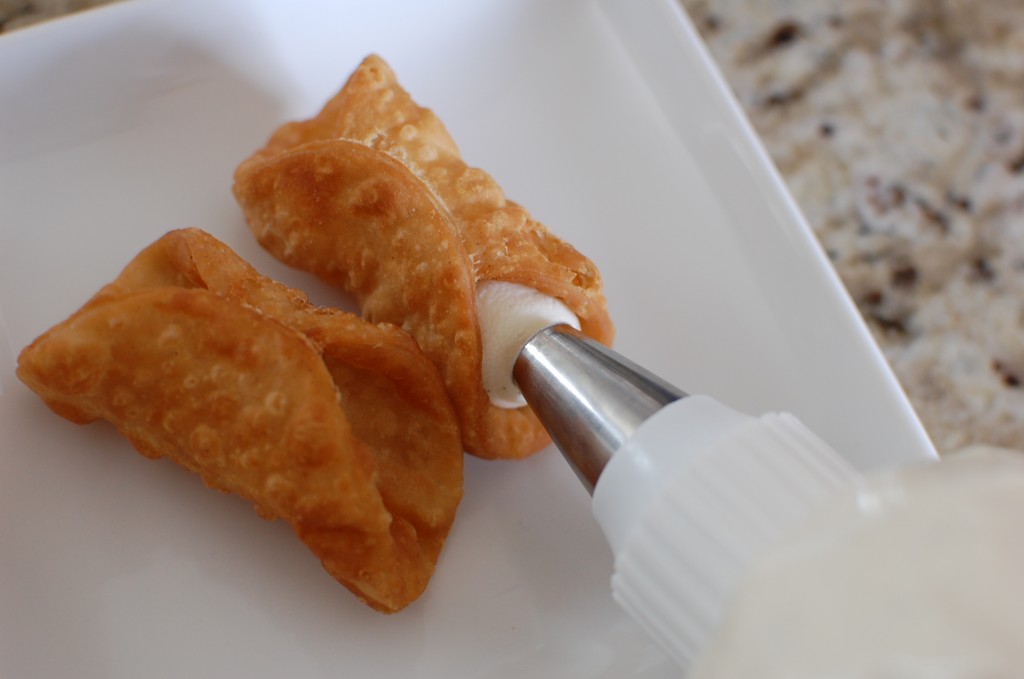
15. Just before serving: Starting at one end, pipe the filling into the cannoli shell. Remove, then pipe the filling into the other end.
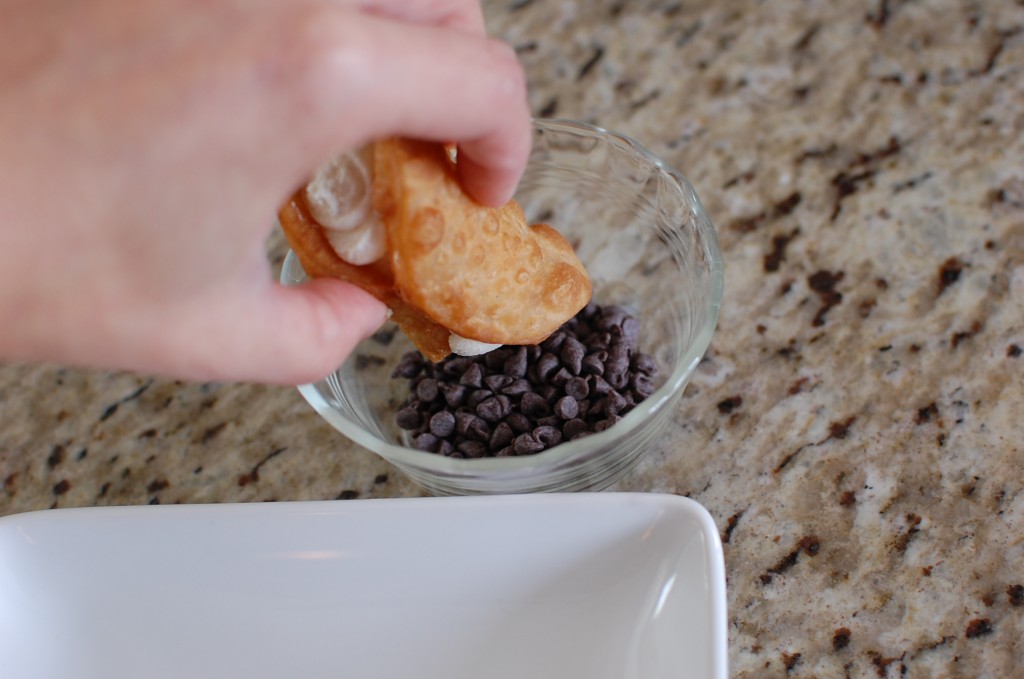
16. Once you have piped the filling into both sides of the cannoli shell, you can decorate the cannoli with mini chocolate chips or chopped nuts.
17. Dip the filling ends of the cannoli into mini chocolate chips, sprinkles, or chopped nuts.
18. Place the cannoli on a serving plate, and dust with powdered sugar.
19. Serve immediately and enjoy!
20. Do not fill the cannoli until just before serving, otherwise your shells will become soggy and not crisp. Store the cannoli shells in a paper towel lined tupperware container at room temperature. The filling will store in the refrigerator for 2-3 days.




Hi! I just made these up for our church’s valentine banquet tomorrow night. My shells are all finished and I just whipped up the filling! The taste/texture was a little off for us so I added 1/2 cup of whipping cream whipped up, along with about another 3/4 cup powdered sugar and some almond extract. Yummy! Thanks for posting!
Yay! I’m so glad it worked out for you! The filling is all to your taste – so if you prefer a creamier and sweeter filling, by all means mix it up to your liking – that’s the nice thing about this recipe. The filling can be customized to your preferences.
If I wanted to bake them instead of frying them, do you know what temperature and for how long I would need to do so?
Thank you.
Sorry, I don’t really know? Traditionally, cannoli shells are fried, not baked – and I’ve actually never tried baking them. I’m not sure how the texture will turn out – but you can try it as an experiment… let me know how it turns out for you! I would maybe start at 375 degrees and experiment with the time. Hope that helps.
I tried baking cannoli shells. Believe me, they’re not as good as fried. In fact, they are hard and don’t expand as fried.
Yeah, if you’re going to eat a cannoli… might as well be a good one… so I would definitely fry them then!
I’ve been trying to make cannoli but my filling is to watery , I’ve let it sit in the cheese cloth for 24 hrs could it be I didn’t use while milk????
I usually use whole milk ricotta (homemade) – it’s possible that skim or lowfat could be more watery… Also, different brands of ricotta may have more or less moisture in them.
How did you set up your colander? Was the colander somewhat elevated from the bowl bottom? If the water level touches the ricotta, then the draining will not happen very well. Also, it works out better if you “spread out” the ricotta along the cheese cloth – the more surface area of ricotta is against the cheesecloth, the better it will drain. If the ricotta looks like just a ball in the middle, it will take longer to drain. You kind of have to play it by ear with the draining step – make sure the ricotta is nice and thick before you add it to the filling ingredients.
I just made these and they were amazing! Thanks for posting the recipe!
Glad to hear it worked out for yoU!
Can u tell me. ASAP…..what the yield is for a singular recipe? Ty ; )
It all depends on how large you cut out your circles. I would estimate about 24-32 cannolis depending on how large you make your circles.
How do you make your homemade ricotta?
This is how I make ricotta from scratch (it’s really easy!):
http://www.the350degreeoven.com/2011/09/italian/fresh-homemade-ricotta-cheese/
Dear Mika, Can I fry the shells a day ahead or will they lose their texture/flavor? I won’t have time in the morning before my son’s graduation but I’d love to make this for the lunch following the ceremony.
Thanks,
Elisa
If you fill the shells the day before, they might end up soggy by the next day. You can make the filling and the shells ahead of time, store the filling in a piping bag ready to go – then just pipe them in at the last minute.
When I make my shells, they keep for months in airtight container. My recipe calls for white vinegar. I think it makes them crispier?
What can I use to make the holder for the shells to fry
If you are looking for something to hold the cannoli while you fry them, then I would use tongs. If you mean cylindrical forms to wrap the dough around, wooden dowels or metal tubes work well (you can buy them online for pretty cheap).
I have a question, is there something else that can be used as a substitute for the Marsala wine? Perhaps a juice of some sort…..a grape juice?
If you are looking for a non-alcoholic substitution, I would go with grape juice. If you just don’t want to buy a big bottle of Marsala wine that you might not use again… maybe use sherry, brandy, or white wine. (I get Marsala wine at Trader Joe’s usually – a bottle keeps a long time and it is quite inexpensive… and it makes a wonderful addition to chicken and pasta dishes if you are considering what to do with the rest if you have leftover!)
I LOVE Marsala Chicken… Yumm
Greetings, Thanks for sharing this recipe tutorial. Very well explained. Step by step making it very easy to follow. Congratulations.
Hi,
How long do you allow the cannoli dough to rest? I just got my metal forms and I can’t wait to try this recipe.
Allow the dough to rest for about 1-2 hours at room temperature.
Hi! Have you ever tried to fry in coconut oil? Thanks!
No, I haven’t… but I’m sure you could try it? I don’t see why that wouldn’t work?
Can you make these and then freeze them? When I make these I have an overabundance of them. I’m trying to cut down on wasting them. So to help with that could I freeze them and then just thaw them out when I’m ready to eat one?
Yeah, I don’t see why not? Just make sure you wrap tightly in plastic so that they don’t absorb weird flavors/odors from the freezer.
THEy looks good . I am trying to do them with my grandfather.
Hi, what can I use instead of the wine cannot use alcohol.
Hi there. Maybe try grape juice or orange juice? Sorry for the late reply!
Hello! How many cannoli’s did you make from your recipe?
It depends how thick you roll out the dough… but I would guess about at least 2 dozen?
I roll my shells to 1/16 inch. Sometimes they get that beautiful blister and sometimes they don’t. I don’t understand what I’m doing wrong! Oil temp is 365 degrees for 1 minute. Help! I’m so frustrated!
Try about 10 degrees hotter and see if that helps?
If i make the shells and fill them up about 4hrs later, will the shells still remain crispy?
Maybe? It’s hard to say… you could certainly try it. If you like a crispy texture it’s better to fill just before serving if possible.