Merry Christmas everyone! Now that Christmas is almost here… I thought I would post my method for making cute little “Gingerbread Houses” from graham crackers. I’ve been making these little graham cracker houses since I was a kid – because it is so easy and because you don’t need any specialized ingredients! All you need are some graham crackers, powdered sugar, egg (preferably pasteurized), and candy! (Most people probably have the ingredients in their cupboards right now.)
If you are looking for a fun activity for kids, graham cracker makes it quick and easy – just make the “gingerbread houses” ahead of time and let the kids decorate them with candy once done. (If you have any leftover candy from Halloween, this is the perfect way to get rid of it!)
Yes – you can bake real gingerbread to make these houses, or you can buy a pre-made gingerbread house kit… but it’s much more simple (and less expensive) to use graham crackers. I saw a premade kit for sale at the supermarket a few weeks ago… it was about $19, and basically was just the side pieces and roof for the house, along with a little packet of candy and royal frosting. You could make four gingerbread houses out of graham crackers for that price!
**If you are planning to eat these, then make sure you use pasteurized egg to make the royal icing to be safe.**
Graham Cracker “Gingerbread” Houses:
- 1/3 box of Graham Crackers
- Assorted candy
- 1 batch Royal Icing
- Paper/Plastic disposable plate
Royal Icing:
- 1 egg white (or about 2 T. pasteurized egg white)
- 2-4 c. powdered sugar
ROYAL ICING (Dries hard and opaque, great for frosting cookies, or using as frosting “glue”)
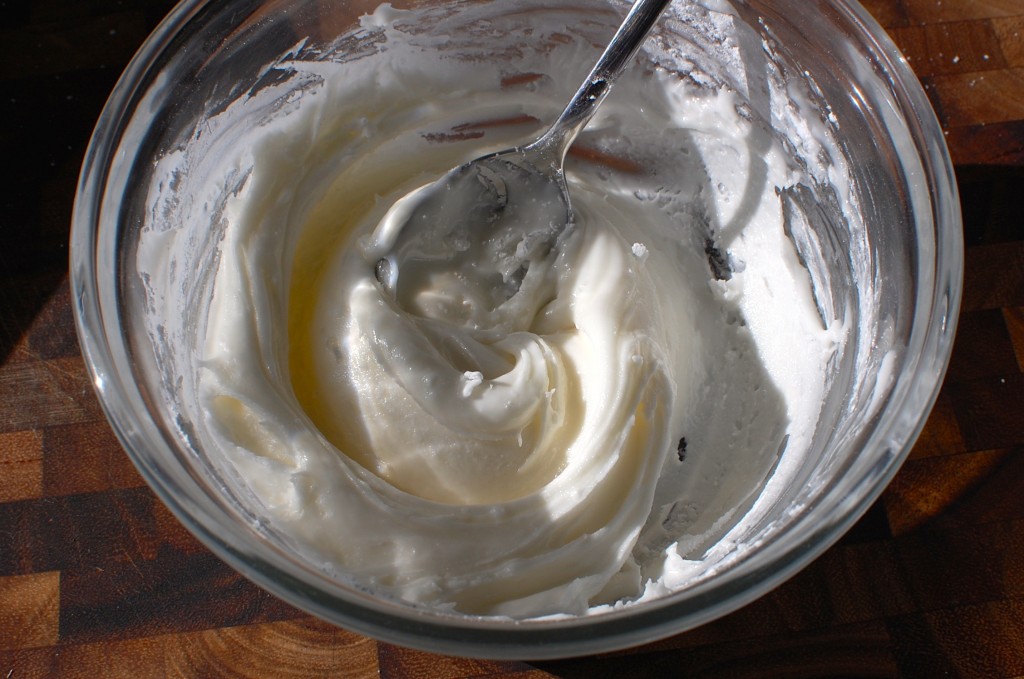
1. Mix the pasteurized egg white and a little bit of powdered sugar (I would start with 1-2 c.). You will need to play around with adding a little bit more powdered sugar, and continuing to mix, until you get the right consistency – you want the icing to be thin enough that you can pipe it, but thick enough so that it will hold its shape when you pipe it (similar to toothpaste texture). In this bowl, I needed 1 pasteurized egg white + 3 cups of powdered sugar. How much you need depends on how large your egg white is, and the humidity of your environment.
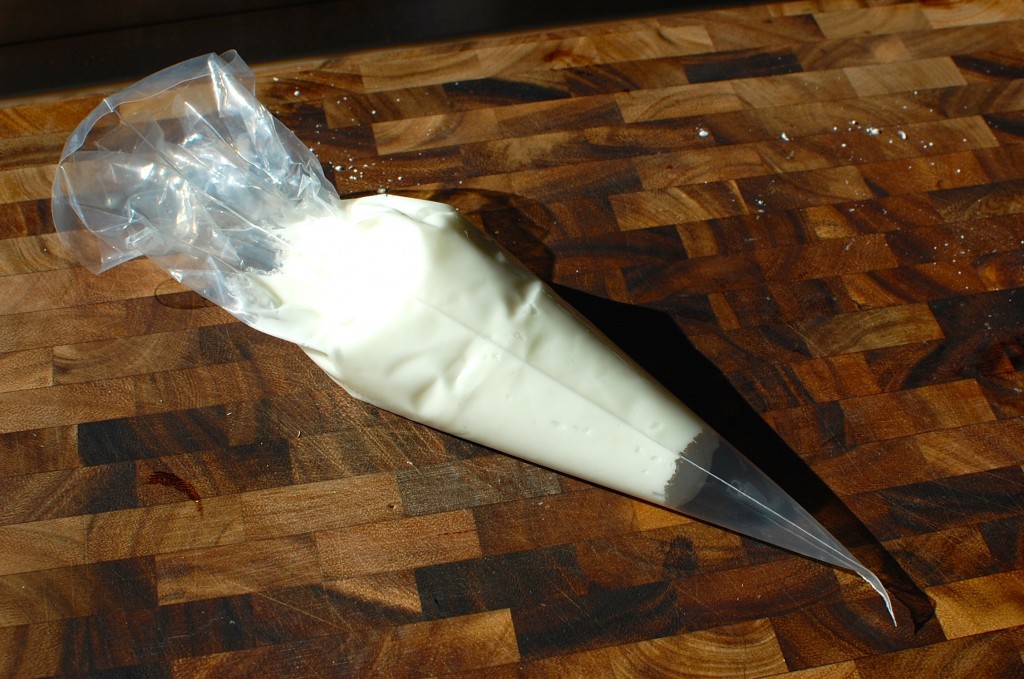
2. Once your royal icing is the appropriate texture, place it in a pastry bag (or inside a thick gallon sized ziplock bag). Cut the corner off to pipe the icing as “glue” to hold your graham cracker houses together, or to glue candy to the houses.
GRAHAM CRACKER “GINGER BREAD HOUSE” CONSTRUCTION (Make these a few hours or up to 1 day ahead of decorating to give time for the royal icing to set and “glue” the houses together more solidly. You could decorate them immediately if you want, but they will be a little bit more fragile. If you are making these with kids, it’s probably better to make sure the royal icing has had time to set first if possible.)
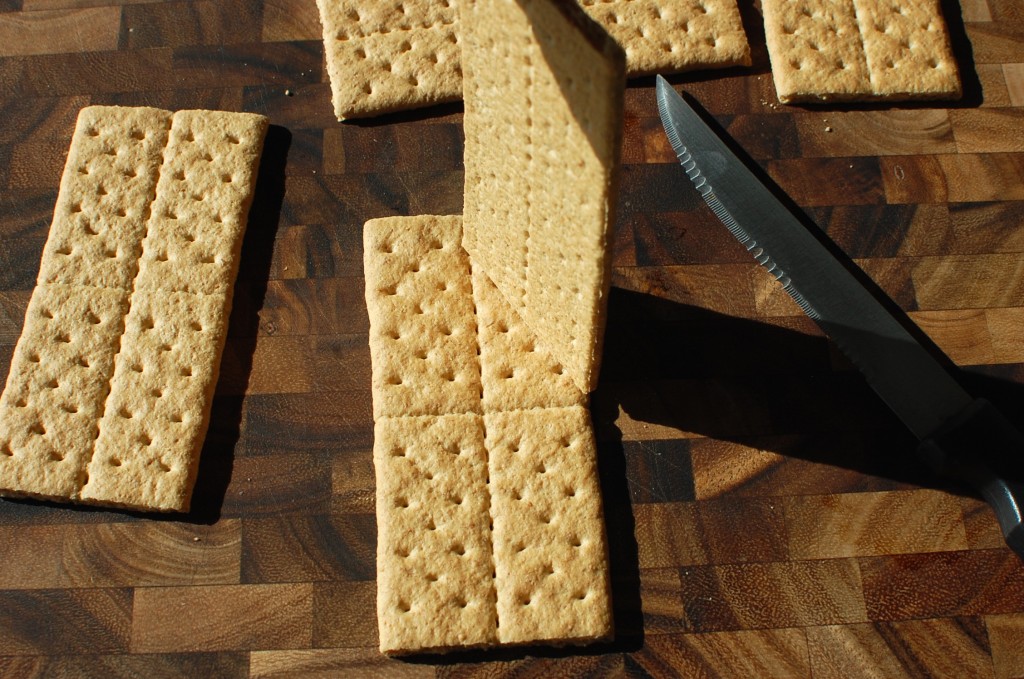
1. You will need about 6 long (unbroken) rectangles of graham crackers for each house. Make sure that you have extra, in case the crackers are broken in the box, of in case they break when you are cutting them. Two rectangles will be the long sides of the house, two rectangles will be the roof, and two rectangles will be cut to become the short sides of the house (holding up the roof). Hold the short edge of one cracker along the midline of another cracker to get an idea of where you need to cut the roofline.
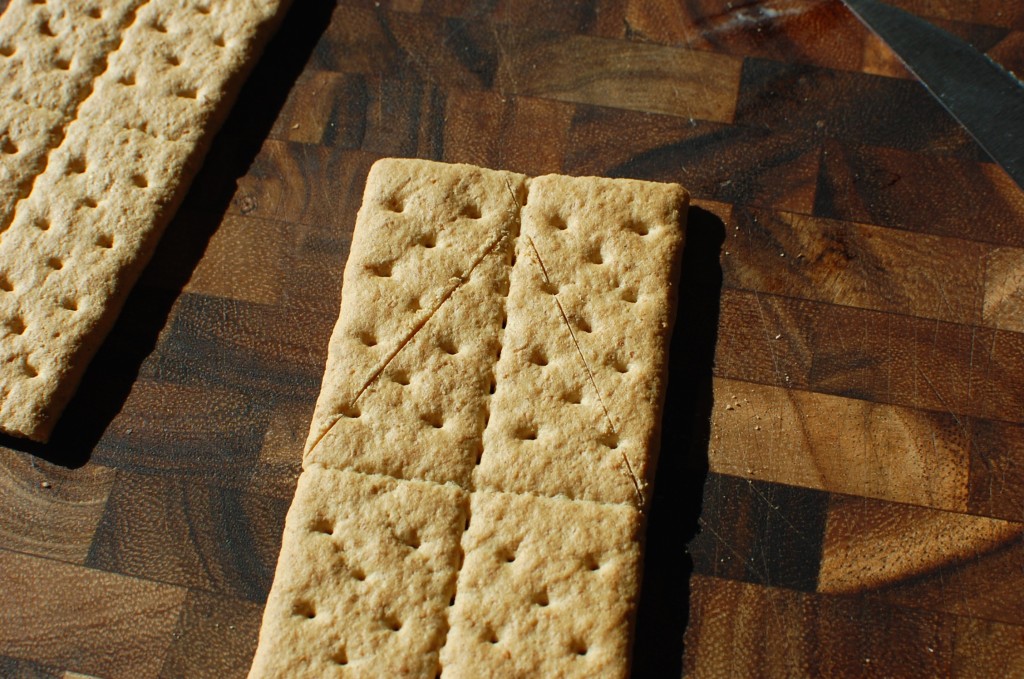
2. Lightly mark the roof line (scratch it in lightly with a serrated knife).
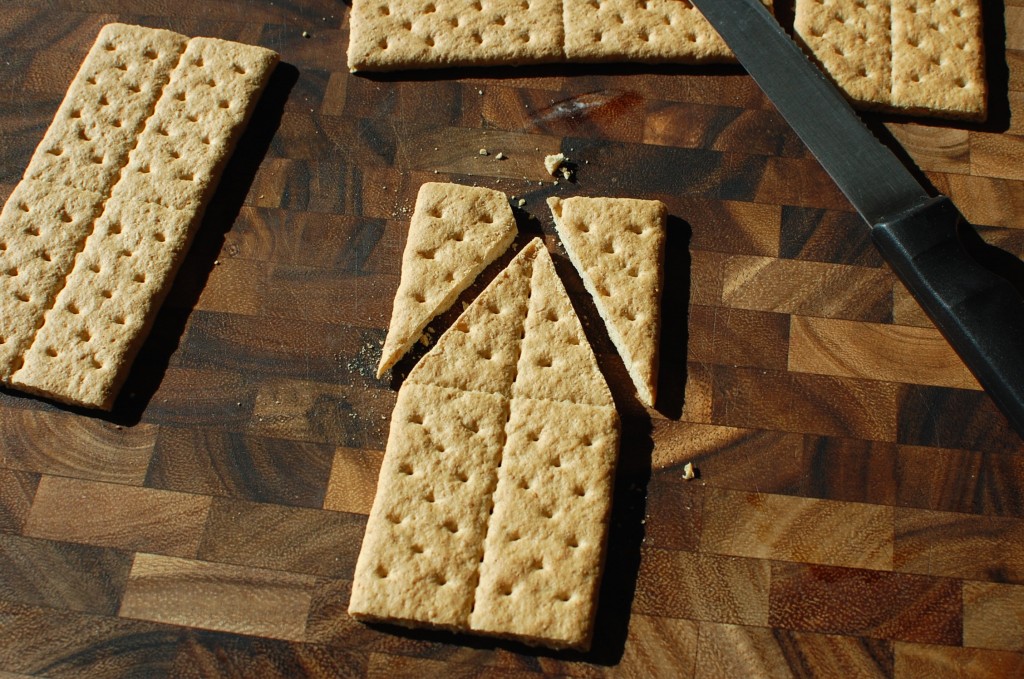
3. Very carefully, saw back and forth with a serrated knife to cut away the sides of the graham cracker. You will need to make two of these side pieces for one house.
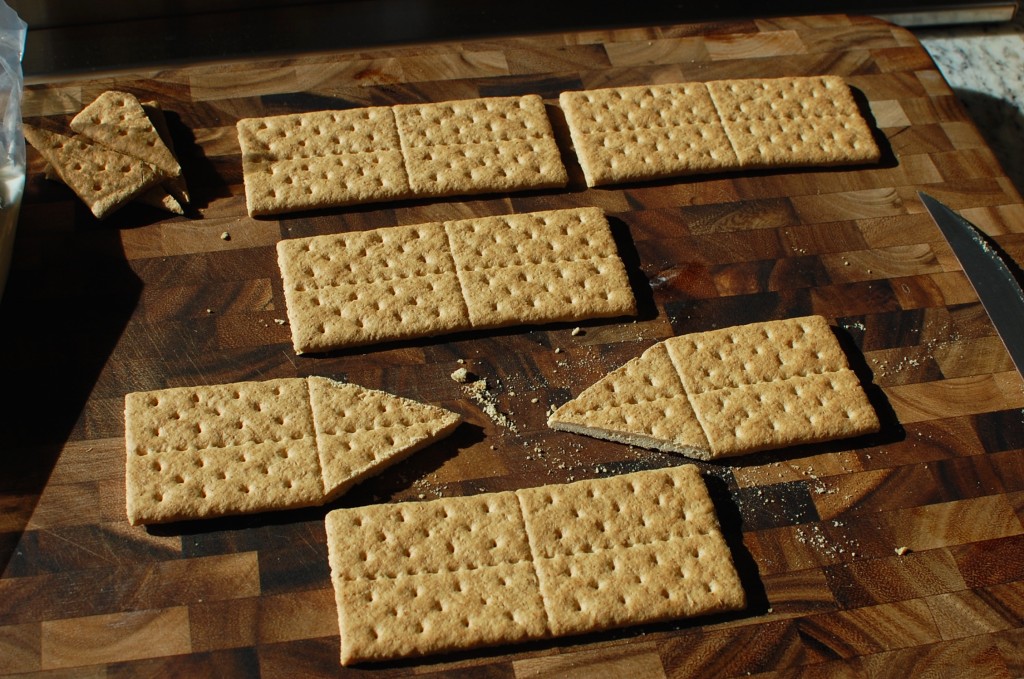
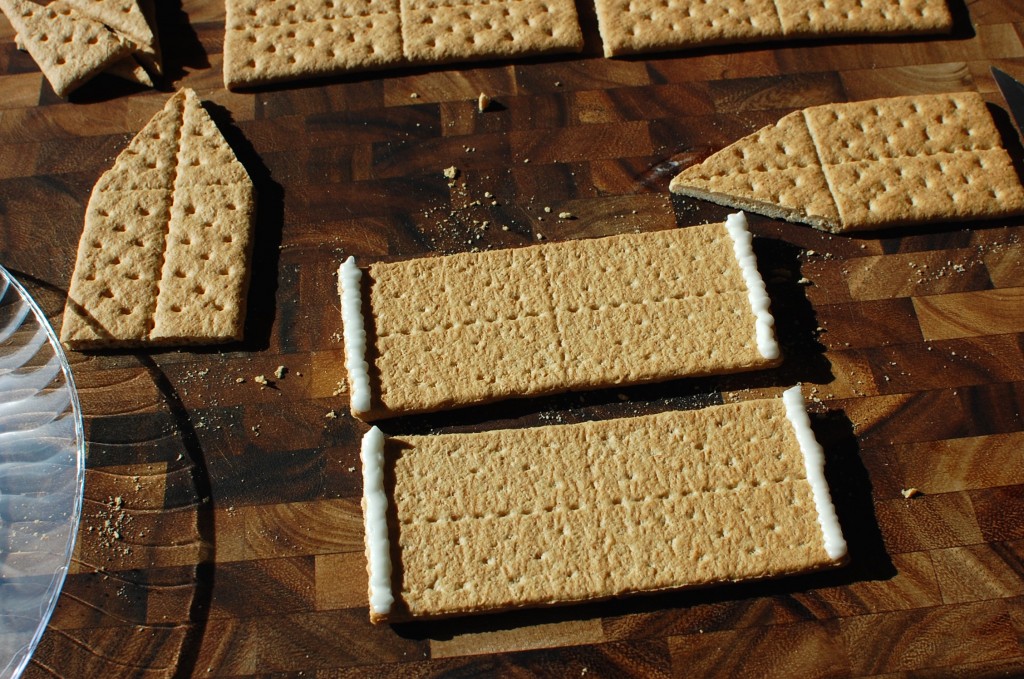
4. These are the pieces you will need to have ready to construct one house. The two rectangles on the top of the picture will be both sides of the (pitched) roof. The two other rectangles and the two cut pieces will end up being “glued” together with the royal icing to create the base walls of the house.
5. Pipe royal icing along the sides of two of the rectangles.
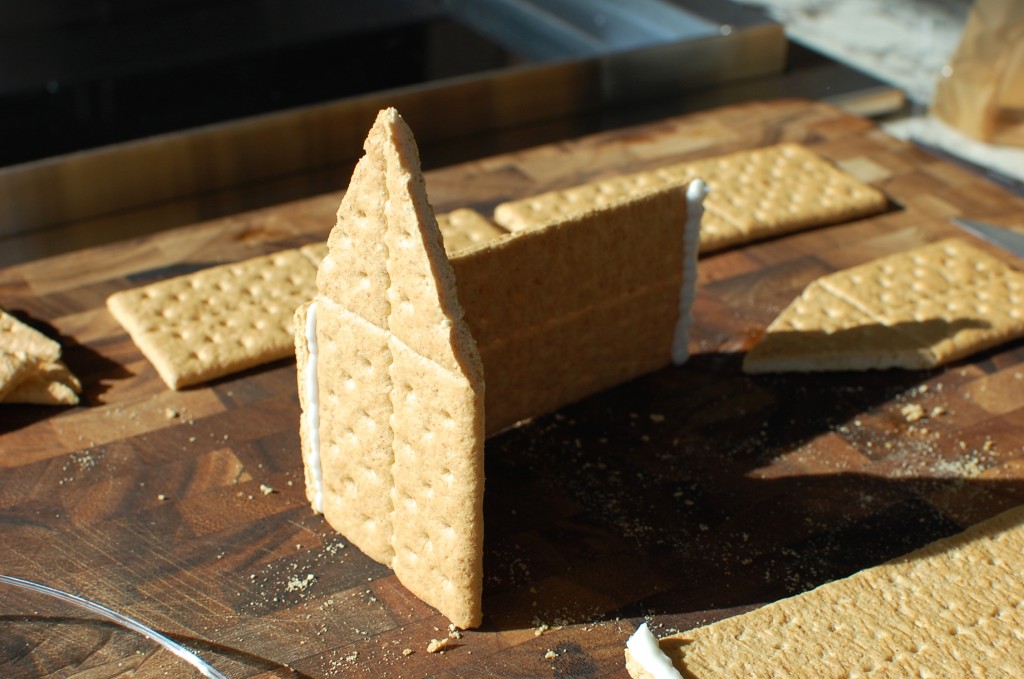
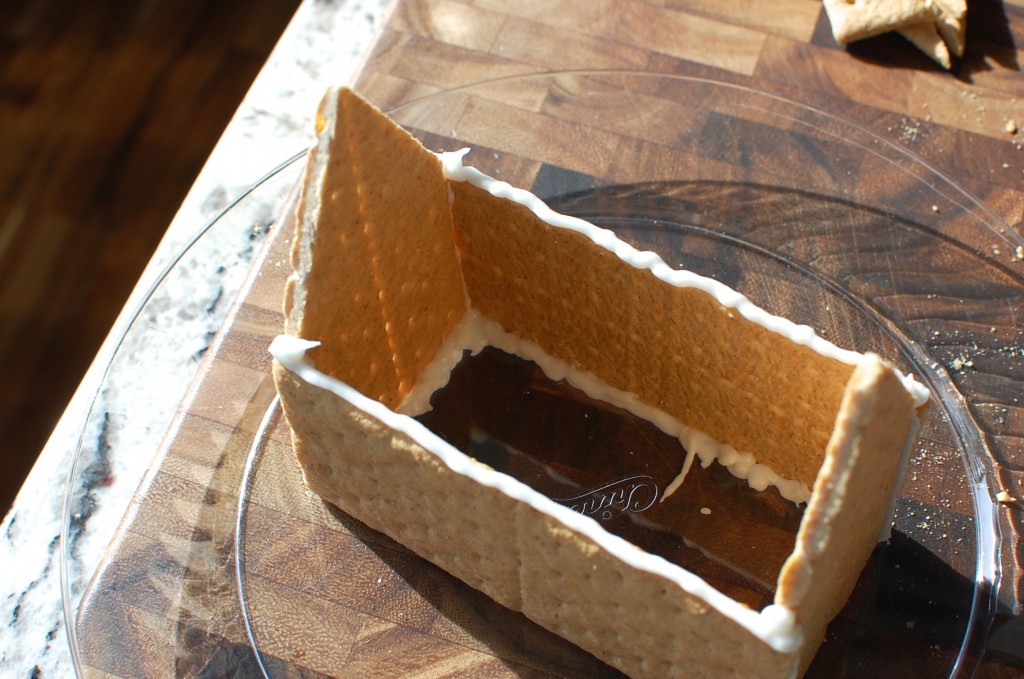
6. Now you will begin to construct the house. Stand up the cut piece, and place one of the rectangles with the royal icing along the edge so that the pieces are standing up.
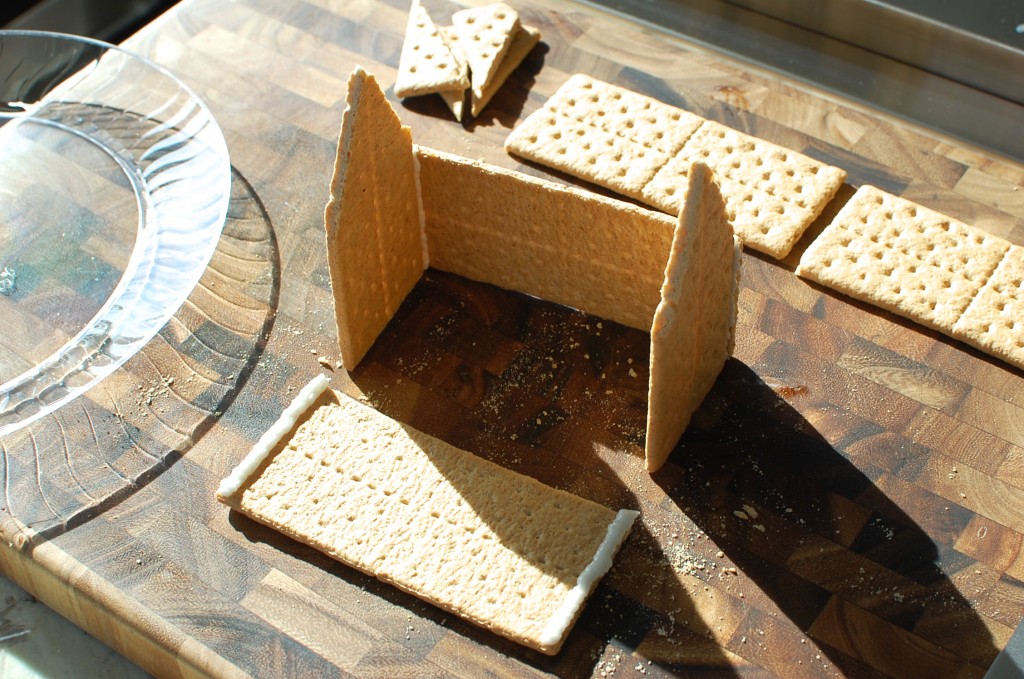
7. Now add the second cut piece to make 3 sides of the house.
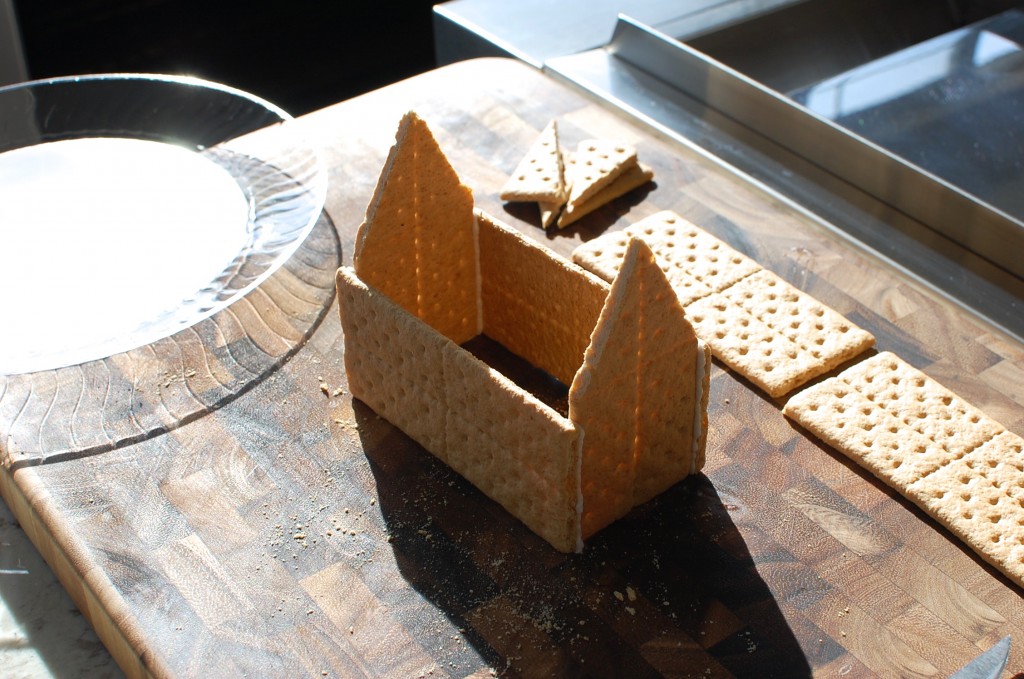
8. Carefully place the other rectangle with the royal icing along the edge against the two standing cut pieces, to form the base of your house.
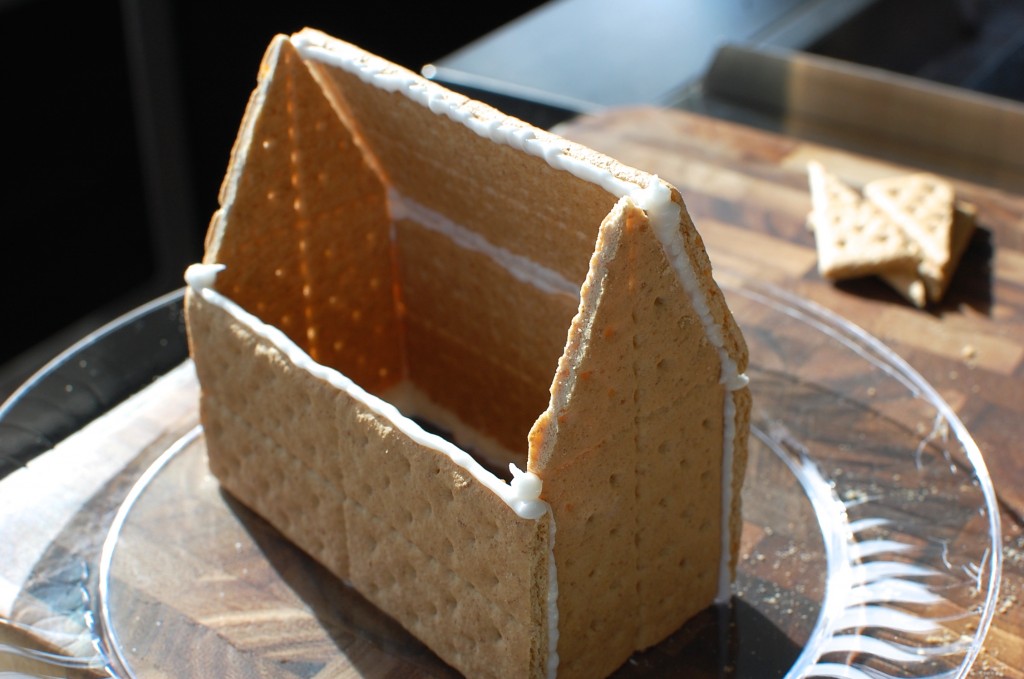
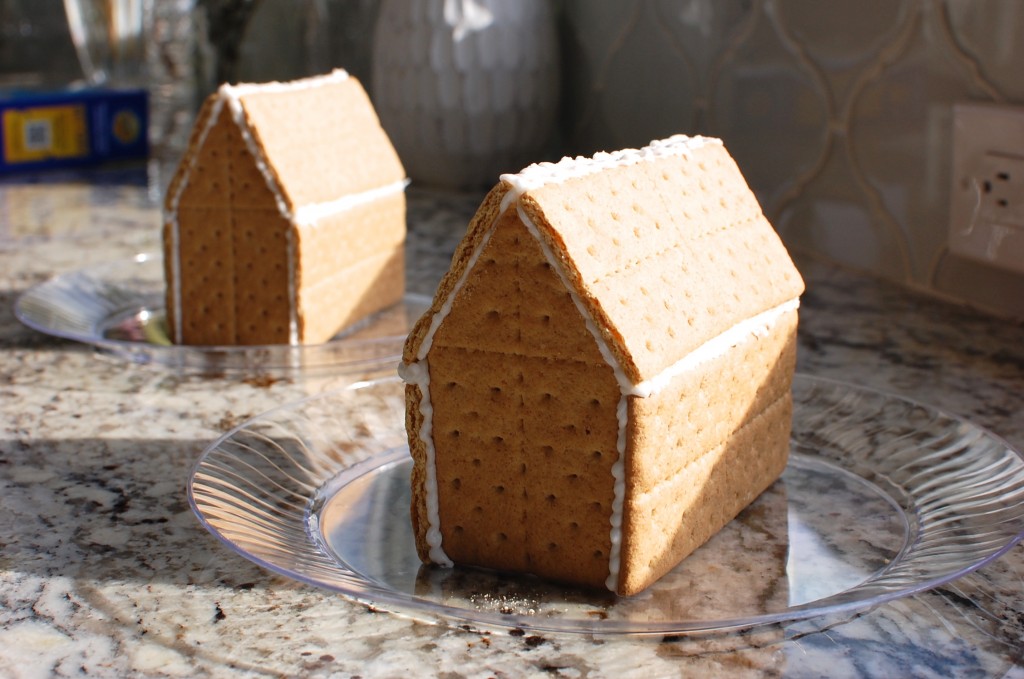
9. Now you will move the base of your house to the disposable plate or serving platter. (I use disposable plates because I planned to give these away to my little nephew. Even if you are keeping these, though, you might want to at least use a disposable surface (like foil) wrapped around a real plate for easy clean up – the royal icing gets very hard (like cement) once dry.) Carefully pipe some icing inside the house along the plate to beef up the support, and essentially “glue” it to the plate. This will make the house more stable once dried, and less likely to move around on the plate or collapse (without the icing showing on the outside). You will also want to pipe some icing on the top of the long “walls” of the house… in preparation for gluing on the roof.
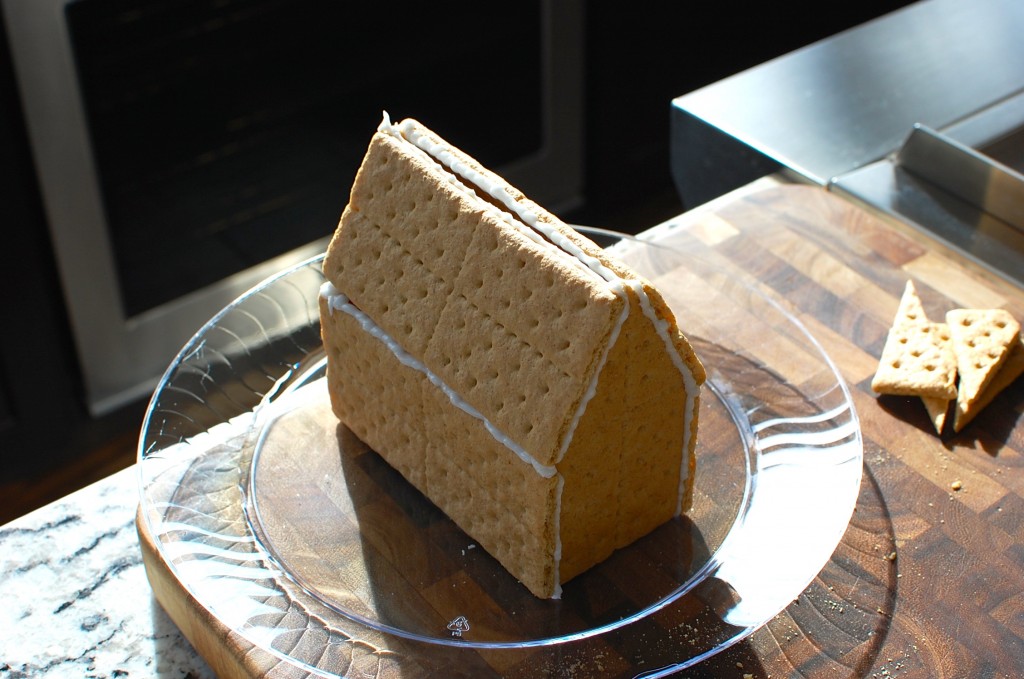
10. Pipe royal icing along 3 sides of the remaining two graham cracker rectangles. Place the un-iced edge along the long walls of the house, and press the roof gently to the edges of the cut piece to adhere.
11. Repeat with the other roof piece.
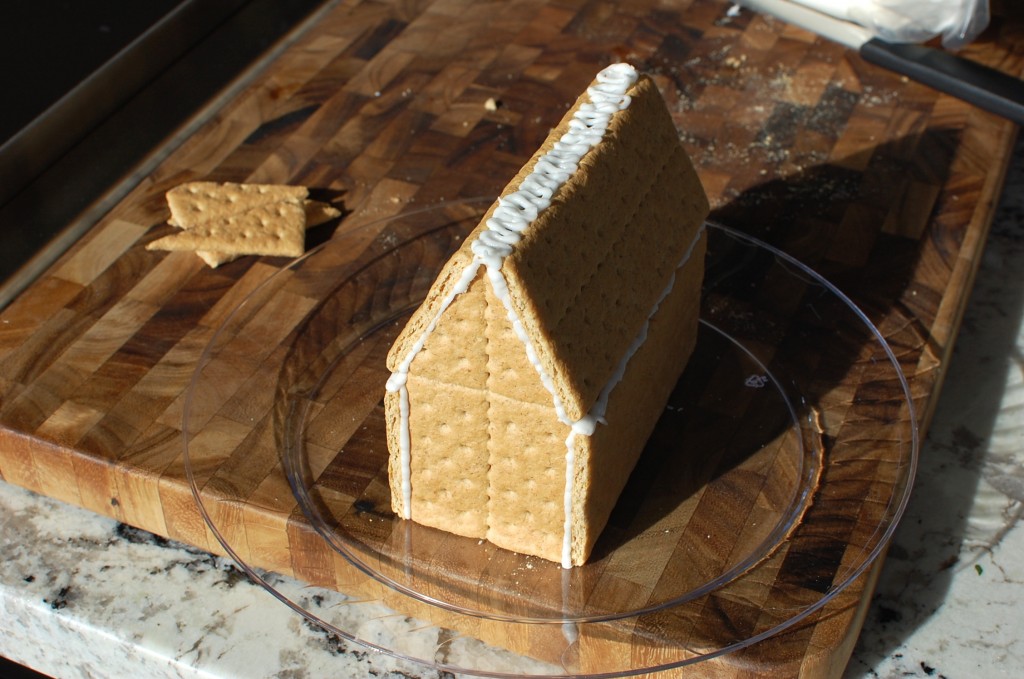
12. If you have a gap along the top, fill it in with royal icing by piping it across in a zigzag pattern.
13. Allow your houses to sit and dry for a few hours – to give time for the royal icing to set and harden. This will make the houses more stable when decorating – which is a good idea if you are making the structures for children to decorate. You can proceed immediately if you want – just be careful because the houses will be much more fragile if the royal icing “glue” isn’t yet set.
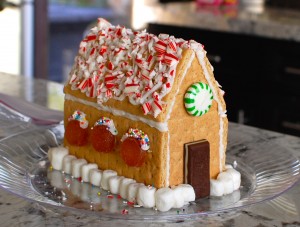
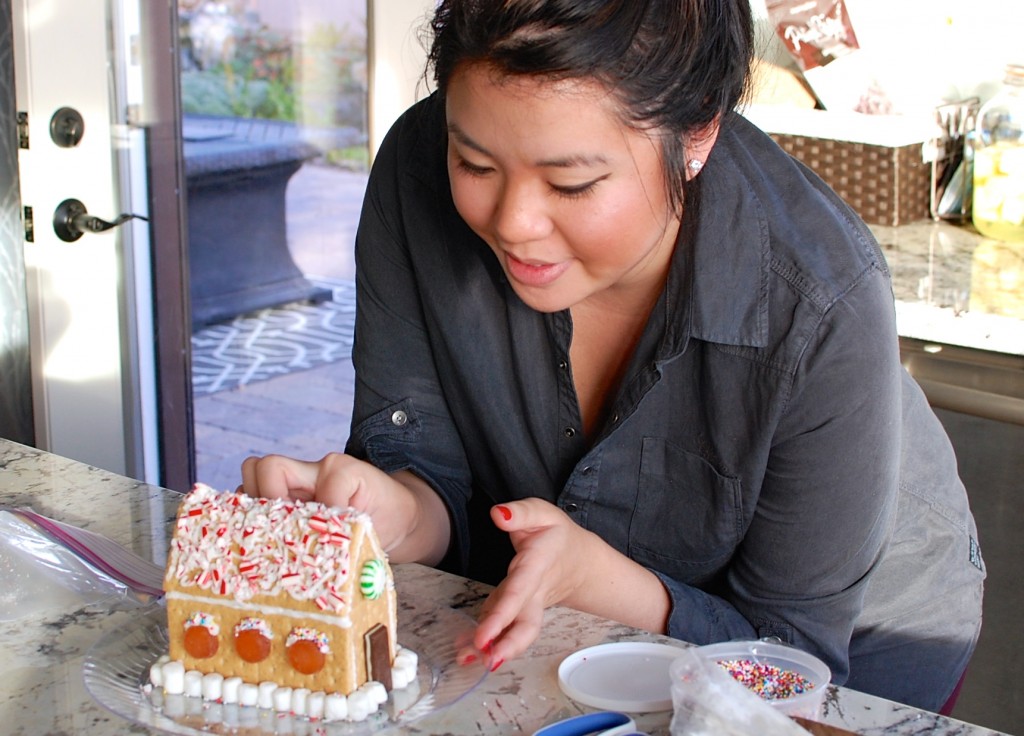
14. Decorate with various candies and edible/sweet items like flaked coconut, crushed cookies/candies, etc. Use the royal icing as “glue” to attach candy decor to the houses. (Here is my Brother-in-law’s fiancée (Caty) designing her “Gingerbread house” – she used crush candy cane for the roof, mango gummies for the windows, green starlight mints, andes chocolate mints, rainbow sprinkles, and mini marshmallows.)
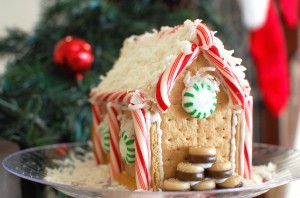
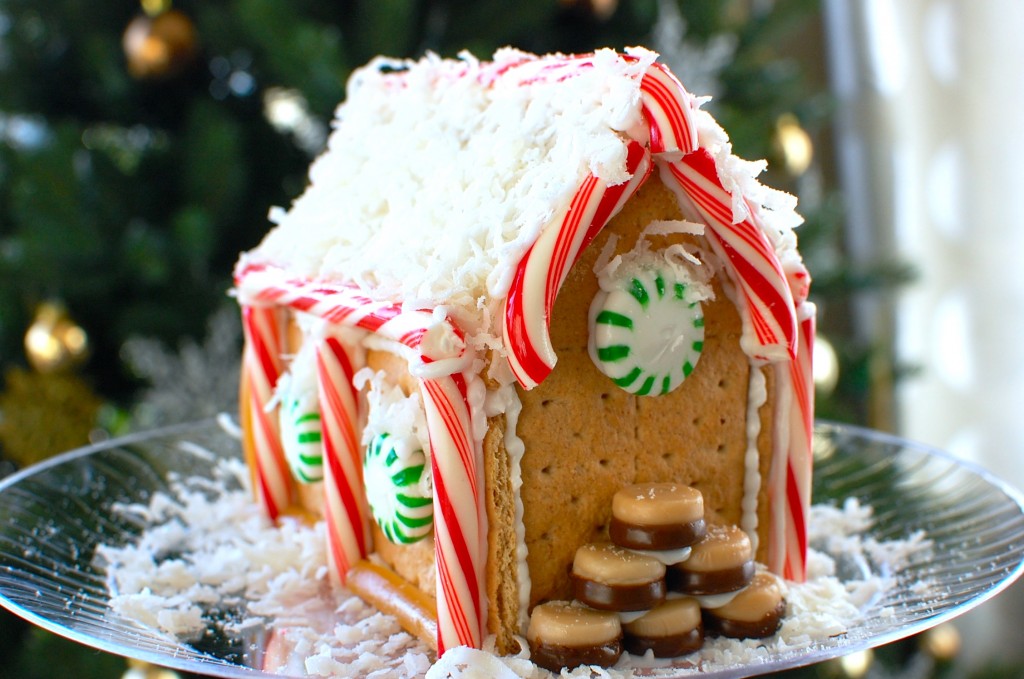
15. For mine, I used candy canes, coconut flakes, mango licorice, coffee candies, and green starlight mints.
Be creative! Use any kind of candies that you want. M&Ms, lifesaver candies, tootsie rolls… whatever candies you have leftover from Halloween would also work. I’ve also made a “Haunted house” version of this “Gingerbread house” for Halloween by using orange and brown candies, and piping on spiderwebs with black/gray tinted royal icing.



Recent Comments